
Project automation is essential for managing consulting projects efficiently as it brings structure, organization, and repeatable processes to the forefront. However, many consulting firms spend considerable time setting up projects manually by creating folders, assigning tasks, organizing files, and ensuring everything is correctly placed. This issue is common among consulting teams using Microsoft 365 and Teams, often resulting in disorganized file storage, inconsistent project structures, and time-consuming administrative work.
Microsoft 365 provides tools like Planner, Teams, and SharePoint, and while Power Automate can be used to build custom workflows, it requires technical expertise to set up and maintain. Alternatively, using a tool specifically designed for consulting workflows—such as Trovve—can simplify and standardize project setup without requiring complex automation skills. Additionally, we will explore how to set up a similar solution using just Planner, Teams, SharePoint, and Power Automate alone.
If you’re struggling with setting up Teams and SharePoint for effective project management, check out our article: How to Set Up Microsoft Teams and SharePoint for Your Consulting Practice.
How Do We Automate Project Setup?
The key to project automation lies in creating project templates that eliminate repetitive setup work. Instead of manually setting up tasks, folders, and project structures every time, you can save a project as a template and use it whenever you start a similar engagement.
By using project templates, you can:
✔ Standardize project workflows so every engagement follows the same structure.
✔ Reduce setup time by copying key elements like tasks, team assignments, and folders.
✔ Minimize errors by ensuring no critical steps or documents are missed.
✔ Improve collaboration by keeping files, checklists, and milestones consistently organized.
In this guide, we’ll walk through best practices for automating project setup in Microsoft 365 and Teams. We’ll use Trovve to demonstrate how you can implement these best practices easily while ensuring seamless collaboration, improved efficiency, and structured project execution.
Why Manual Project Setup is a Major Problem for Consulting Firms
Every time you start a new client project, someone on your team spends hours:
✔ Creating a new project folder and/or channel in Teams or SharePoint.
✔ Setting up tasks, deadlines, and checklists manually.
✔ Assigning the right team members and permissions.
✔ Moving or copying files from previous projects.
✔ Ensuring everything is in place before work can begin.
Here’s why this manual process slows down your business:
✔ Lost Billable Hours – Repeating the same setup for every engagement eats into valuable consulting time.
✔ Disorganized Files – Inconsistent folder structures make it difficult for teams and clients to find critical documents.
✔ Risk of Errors – Forgetting to include key files, tasks, or access permissions can delay project execution.
✔ Reduced Collaboration – Team members waste time searching for information instead of focusing on client work.
To avoid these inefficiencies, consultants should follow a structured project setup process that leverages automation through reusable project templates.
Best Practices for Automating Project Setup in Microsoft 365 & Teams
Microsoft 365 provides many ways to automate project setup, but without a structured approach, automation can be difficult to scale. Here’s how to implement a streamlined project setup process using best practices.
We’ll use Trovve to demonstrate how these best practices can be easily implemented without requiring Power Automate expertise.
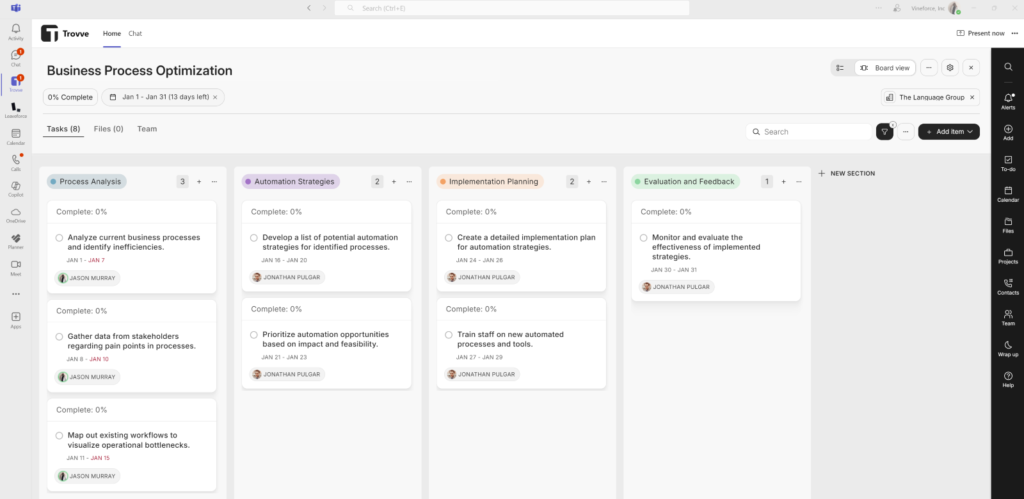
Step 1: Start with an Ideal Project
Before diving into what should be included in a project template, we recommend starting with an ideal project that will be saved as your template. If you’re using Trovve, you should ensure your template includes:
- Tasks – Identify tasks that are consistently performed across projects. Avoid including project-specific tasks.
- Task Descriptions – Provide clear instructions on how to complete each task efficiently.
- Task Checklists – Break down each task into actionable steps.
- Sections/Milestones – Organize tasks into phases for structured progress tracking.
- Team Members – Pre-assign internal teams and external stakeholders if projects frequently involve the same people.
- Checklist Templates – Standardize how tasks are performed by including checklist templates that ensure uniformity.
- Folders & Links (Optional) – Include links to common resources or pre-configured SharePoint folders, but only if you need to use the same files across multiple projects.
Step 2: Save a Project as a Reusable Template
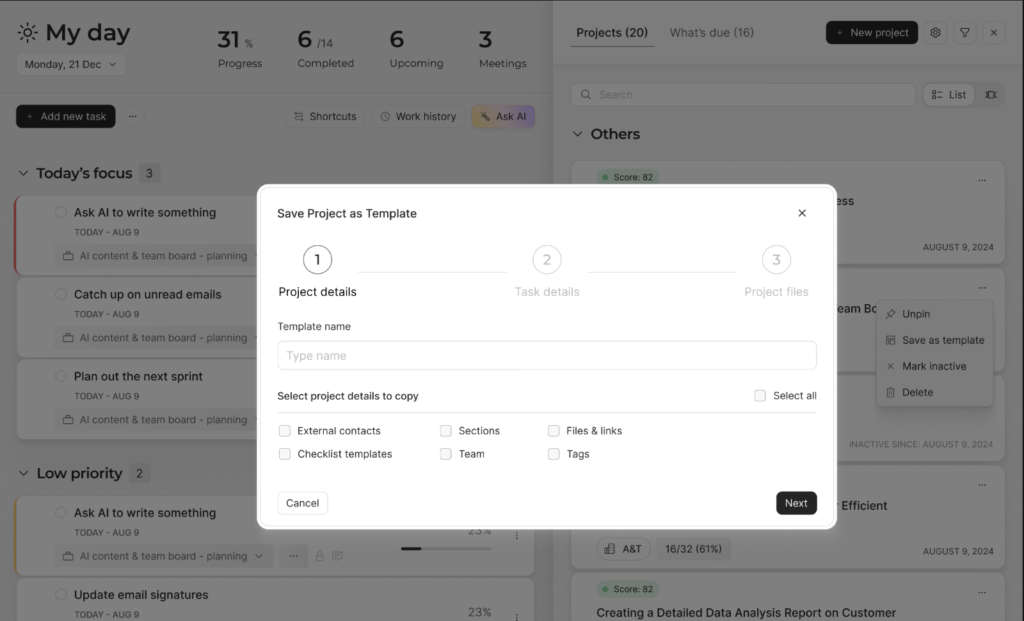
Once you’ve built an ideal project, the next step is saving it as a project template. In Trovve, this process includes three simple steps:
Define Project Details
- Template Name: Name your template properly based on the type of project or service line it will create. This makes it easier to distinguish.
- Select What to Copy: Choose what should be included in the template, such as:
- Sections
- Team members
- External contacts
- Task checklists
Select Task and Workflow Details
- Decide what should be copied, including:
- Task names
- Assignees
- Checklists and checklist descriptions
- Files and links
- Task descriptions
- Start and due dates (Trovve will automatically adjust these based on the new project start date while keeping task durations intact).
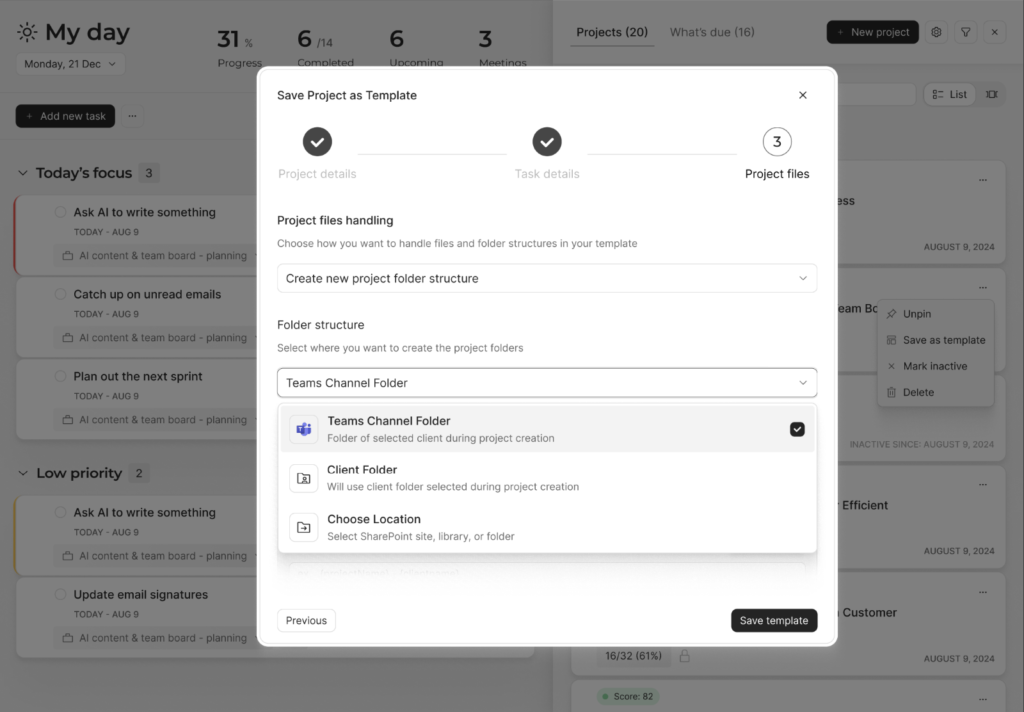
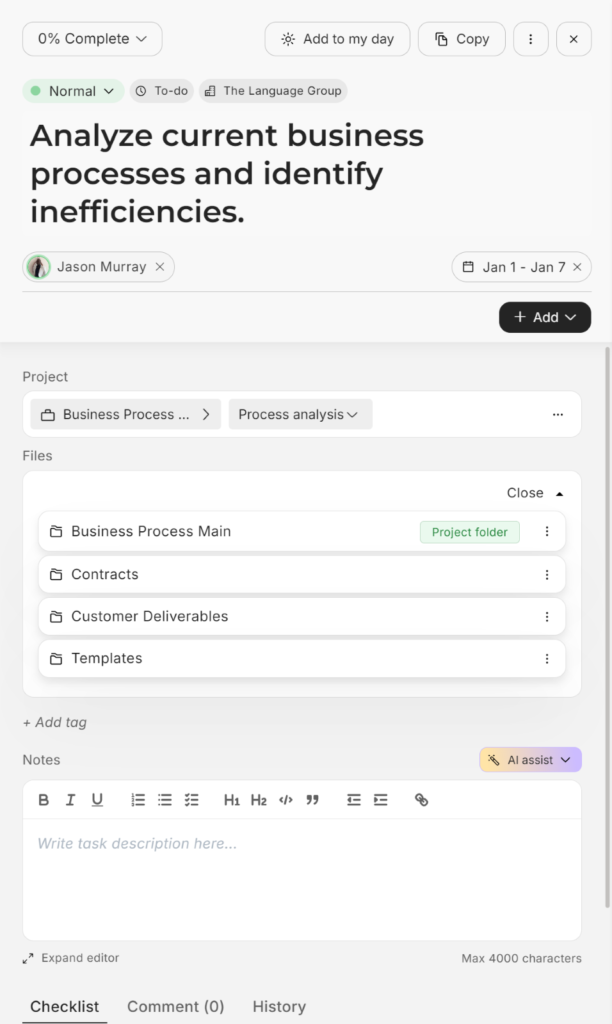
Configure Project Files & Automate Folder Creation
Instead of manually creating project folders each time, automation ensures every project follows a consistent structure.
Folder Setup Options in Trovve
Team Channel Folder – Creates a dedicated folder in a Teams channel.
Client Folder – Places project files inside an existing client folder.
Custom Location – Users can select any SharePoint site, library, or folder to store their project files.
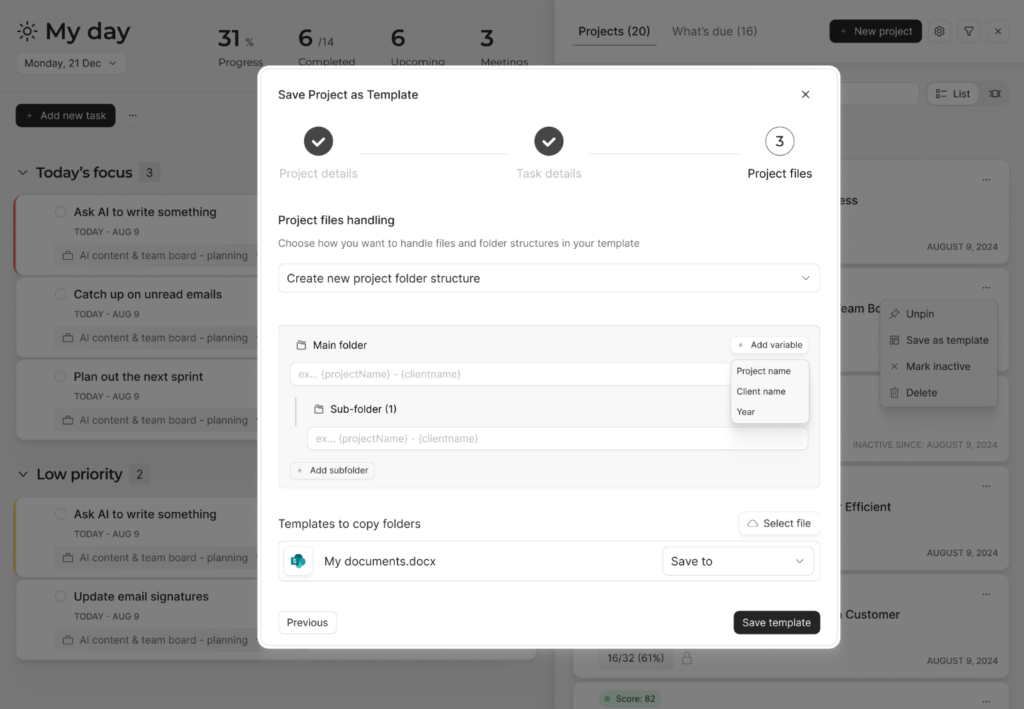
Folder Naming & Organization
- Users can customize folder names using variables such as {ProjectName} – {ClientName} – {Year}.
- Subfolders can be automatically created and labeled with structured names.
- Files can be copied into designated folders for easy access.

Benefits of Linking Folders to Projects
Project automation significantly enhances efficiency by linking folders to projects, streamlining document management for teams. Managing multiple projects can slow teams down when they need to search for or request access to project documents. With Trovve, once a SharePoint folder or file is linked to a project, all associated tasks inherit these files, allowing seamless access without leaving Trovve or Microsoft Teams. Team members can upload new documents or share files with clients in just a few clicks—eliminating the need for manual searches.
Unlike Planner, which lacks built-in document-linking capabilities, you can achieve a similar setup by adding Planner to a Teams channel and using the channel’s Files tab as your project folder. Alternatively, shortcuts to relevant folders can be pinned for quick access.
However, Trovve automates this process, ensuring files are always available within the workflow, saving time, and improving project efficiency.
How to Achieve This with Planner, Teams, and SharePoint Only
Although Microsoft 365 does not offer native project automation, a semi-automated project setup can be achieved by utilizing SharePoint lists, Microsoft Forms, and Power Automate. This method will enable the standardization of project creation, though it necessitates manual setup and continuous maintenance.
Step 1: Create a SharePoint List to Act as a Project Template
- In SharePoint, create a list called “Project Templates” to store reusable project structures.
- Add columns to define project elements:
Project Name
Folder Structure (Predefined names for standard folders)
Planner Buckets (Task categories: Kickoff, Execution, Review, etc.)
Milestones (Standardized deliverables)
Assigned Team Roles (Who should be involved by default)
- Populate the list with template data for different project types.
Limitation:
No built-in duplication feature—Power Automate must be configured to copy template data.
Step 2: Use Microsoft Forms (or Another SharePoint List) to Kick Off Projects
- Create a Microsoft Form or a SharePoint list called “New Project Requests”.
- Include fields such as:
Project Name
Client Name
Project Type (Linked to Template List)
Start Date
Team Members
- When a new form is submitted, Power Automate can trigger project creation.
Limitation:
Forms cannot create projects directly—Power Automate must handle the logic.
Step 3: Automate Microsoft Teams Channel and Planner Board Creation
- Use Power Automate to:
Create a new channel in Microsoft Teams using the project name.
Create a Planner board linked to the new channel.
Import default tasks from the Project Templates SharePoint list into Planner.
- Assign the project team members based on the form submission.
Limitation:
No automatic task start and due date logic—these must be manually configured in Planner.
Step 4: Automate Folder Structure in SharePoint
- Use Power Automate to:
Create a project folder in a predefined SharePoint document library.
Generate subfolders based on the folder structure in the Project Template list.
Grant appropriate permissions to the project team.
- Optionally, preload documents from a central template library.
Limitation:
No dynamic document linking users must manually associate files with Planner tasks.
Key Limitations of Planner, Teams, and SharePoint Alone
❌ No Full Automation – Project setup requires complex Power Automate configurations for each project type.
❌ No Risk Monitoring – Delays or bottlenecks are not automatically flagged, requiring manual oversight.
❌ Hard to Make Changes – If you need to update or create a new template, you must manually modify both the SharePoint list and Power Automate flow for each change.
❌ No Built-in File-Linking to Tasks – Files stored in SharePoint must be manually linked to corresponding tasks in Planner, increasing administrative effort.
Final Thoughts
For consulting firms, efficiency drives profitability, and reducing manual work is essential.
By following this structured approach, you can:
✅ Standardize project setup, ensuring consistency across engagements.
✅ Reduce administrative overhead, minimizing repetitive tasks.
✅ Enhance collaboration, keeping teams aligned and organized.
While SharePoint, Teams, and Planner can create a repeatable workflow, they require manual intervention and complex Power Automate configurations, lacking the seamless automation and risk tracking found in Trovve.
Looking for a faster, automated solution? Book a meeting or start a 7-day free trial of Trovve today.
