Microsoft Planner vs Microsoft Project: Selecting the Ideal Microsoft Solution for Your Project Scope 

For project management within the Microsoft ecosystem, various Microsoft task management apps like Microsoft Planner and Microsoft Project are frequently highlighted. Both tools provide powerful solutions but cater to varying requirements based on the project’s size and intricacy. Choosing between them can be tough when trying to match your team’s unique needs and the project scope. This article aims to explain the main differences, functional features, and the situations where each tool shines, aiding you in picking the best Microsoft solution for your project.

 Selecting the Appropriate Tool for Your Project

The choice between Microsoft Planner and Microsoft Project depends fundamentally on the specifics of your project. Microsoft Planner is an intuitive task management tool suitable for smaller teams and less complex projects, particularly in agile project management settings. It allows teams to easily assign tasks and track progress, enhancing collaboration and efficiency. Conversely, Microsoft Project is a comprehensive project management solution equipped with advanced features like Gantt charts, detailed scheduling, resource management, and seamless integration with other Microsoft 365 applications.

For projects necessitating meticulous planning, thorough resource allocation, and real-time tracking, Microsoft Project is the preferred option. It enables project managers to define tasks, establish dependencies, allocate resources, and closely monitor progress. Additionally, Project for the web offers a cloud-based project management application that facilitates easy project creation and collaboration. Meanwhile, Microsoft Planner excels in scenarios where team collaboration and simplicity are key, offering a straightforward task management approach without extensive setup or training requirements.

 Addressing User Fears and Aspirations

Deciding between Microsoft Planner and Microsoft Project often involves deeper emotional factors. Teams leaning towards Microsoft Planner might prefer its straightforwardness and user-friendliness, avoiding potential complexity associated with tools like Microsoft Project. Concerns about making the wrong choice, particularly regarding cost and usability, can also lead users to select Planner since it’s included with Office 365 and doesn’t require extra licensing fees.

While Microsoft Planner is excellent for team collaboration, those looking for a personal task management app might find Microsoft To-Do more suitable for individual task tracking.

Conversely, project managers who opt for Microsoft Project are typically motivated by the desire for great precision and control. The sophisticated features of Microsoft Project enable meticulous tracking and detailed reporting, instilling confidence in managers that they can efficiently manage complex projects with multiple dependencies and resources. This assurance often plays a crucial role in choosing a more advanced tool, despite its steeper learning curve.

 Collaboration and Team Dynamics

Social motivations are essential in influencing decision-making processes when selecting project management tools. Microsoft Planner focuses on team collaboration, fostering a sense of community and shared accountability among members. Its integration with Microsoft Teams, coupled with features for easily assigning tasks and tracking progress, makes it a preferred option for teams that prioritize open communication and collective responsibility.

Conversely, while Microsoft Project also provides collaborative capabilities, it is better suited for environments where structured project management and individual accountability are emphasized. Although teams can effectively collaborate using Microsoft Project, its emphasis on detailed scheduling and resource management often results in a more hierarchical setup, in which project managers play a pivotal role in planning and execution.

Conclusion

Deciding whether to use Microsoft Planner or Microsoft Project depends on the requirements of your project and team. Microsoft Planner is perfect for smaller, agile projects that emphasize collaboration and simplicity. On the other hand, Microsoft Project is suited for larger, more complex projects that need detailed planning and resource management. By recognizing the distinct advantages of each tool, you can choose the one that best fits your project scope and organizational objectives.

 Looking for the Perfect Project Management Tool for Microsoft 365 or Microsoft Teams?

Give Trovve a try! Designed to handle any type of project, Trovve helps you plan, communicate, and share project documents and tasks—all within Microsoft Teams. Our AI-enhanced platform is simple to use and fully integrated with Microsoft 365 tools, eliminating the hassle of juggling multiple apps so your team stays focused and on track.

Click here to start your 7-day free trial!

FAQs

1. What is the main difference between Microsoft Planner and Microsoft Project?

Microsoft Planner is a simpler task management tool aimed at smaller teams and projects, featuring Kanban boards and Microsoft Teams integration. Microsoft Project is more robust, catering to larger projects with advanced tools like Gantt charts, resource management, and detailed scheduling.

2. Which tool is better for managing large, complex projects?

Microsoft Project is preferable for large, complex projects due to its advanced planning features, resource allocation, and real-time tracking, making it suitable for intricate tasks, dependencies, and team coordination. It also supports project portfolio management, making it ideal for overseeing multiple projects within an organization.

3. Can Microsoft Planner and Microsoft Project be used together?

Yes, it is possible to integrate Microsoft Planner with Microsoft Project. This integration enables teams to leverage Planner for task management and team collaboration, while utilizing Project for more comprehensive planning and resource allocation. Additionally, Project Online offers a web-based solution for project portfolio management within the Microsoft 365 ecosystem. Together, they provide a versatile approach to managing various project elements.

4. Is Microsoft Planner included with Office 365?

Yes, Microsoft Planner comes with an Office 365 subscription, offering an economical solution for teams already utilizing Microsoft 365 tools. In contrast, Microsoft Project needs a separate license that is billed on a per-user, per-month basis.

5. Is prior experience necessary to use Microsoft Planner or Microsoft Project?

Microsoft Planner is built to be easy to use, so no previous experience is required, making it perfect for beginners and small teams. On the other hand, Microsoft Project is more intricate and might necessitate some training to effectively use its features, particularly for larger projects.

6. How does Microsoft Project facilitate team collaboration?

Microsoft Project includes strong collaboration capabilities, such as its integration with Microsoft Teams, enabling real-time communication, file sharing, and task updates directly within the project. This integration is ideal for managing large teams and intricate projects where effective collaboration is essential.

7. Is there a mobile version of Microsoft Project available?

Microsoft Project is designed for PC use. Although some Project features can be accessed via web-based tools, there isn’t a fully featured mobile app available. On the other hand, Microsoft Planner offers both web and mobile access, making it more convenient for teams who need to stay connected while on the move.

8. Which tool is more cost-effective for a small business?

For small businesses seeking affordability, Microsoft Planner is ideal as it comes with an Office 365 subscription and no extra licensing fees. Conversely, Microsoft Project incurs additional costs, making it better suited for larger organizations with complex project requirements.

9. Which types of projects are most suitable for Microsoft Planner?

Microsoft Planner is optimally designed for small to medium-sized projects that benefit from straightforward task management and team collaboration. It is especially well-suited for agile teams, marketing initiatives, event coordination, and other projects that do not demand intricate scheduling or extensive resource management.

10. Can I track project progress with Microsoft Planner?

Yes, you can use Microsoft Planner to monitor project progress with its dashboard and charts, which are adequate for simple task management in less complex projects. Though these reporting tools are more basic than those in Microsoft Project, they are adequate for simpler projects that don’t need detailed analysis.

11. How do I decide which tool to use for my project?

Choose Microsoft Planner for small projects that need quick setup and team collaboration. Opt for Microsoft Project for complex projects requiring detailed planning, resource management, and advanced reporting.

Top Microsoft Planner Alternatives: Free and Paid Options for Enhanced Task Management

Effective project management is essential today. Although Microsoft Planner is widely used for task organization, it may not fulfill every team’s requirement due to its limited functionality and collaboration features. For those looking for more robust or customizable options, several of the best Microsoft Planner alternatives offer greater flexibility and advanced features. This article explores some of the top alternatives, highlighting their advantages and how they can boost your team’s productivity. Whether you need superior collaboration tools, more customization, or advanced project management functions, these alternatives are worth exploring.

Why Consider Microsoft Planner Alternatives?

While Microsoft Planner can be convenient within the Microsoft 365 suite, it has certain drawbacks that might lead teams to seek other options. Unlike Microsoft Project, which is known for its complexity and powerful features for managing large-scale projects, Microsoft Planner offers comparatively less functionality, insufficient customization options, and difficulties in collaboration. For example, navigating Planner’s interface can be cumbersome, and it lacks capabilities such as tagging team members in comments or providing more sophisticated project views like Gantt charts. If your team needs more powerful tools for managing complex projects, dealing with vast amounts of data, or integrating easily with non-Microsoft applications, transitioning to a more advanced project management tool might be essential.

Top Best Microsoft Planner Alternatives

1. Trovve

Pricing: Plans range from $16 per user per month when paid annually to $20 per user per month when paid quarterly.

Best for: Teams seeking an AI-enhanced project management solution integrated directly into Microsoft Teams. Trovve is particularly suited for project managers, operations managers, and team leaders in project-centric industries like Construction and Technology.

Key Features:

  • Seamless Microsoft Teams Integration: Trovve operates entirely within Microsoft Teams, eliminating the need to switch between applications.
  • AI-Powered Efficiency: Offers smart task suggestions and automated workflows to enhance productivity.
  • Full Microsoft 365 Compatibility: Works seamlessly with existing Microsoft tools.
  • Centralized Workspace: Brings all project elements into one place within MS Teams.
  • Collaboration Tools: Enables easy sharing of documents, communication, and progress tracking.
  • Time-Saving Automation: AI handles task suggestions and workflow optimizations.

Benefits:

  • Saves time by eliminating the need to toggle between apps
  • Reduces errors through centralized information management
  • Boosts productivity with AI-powered insights
  • Offers seamless adoption for teams already using Microsoft Teams

Trovve is a project management app that provides an AI-enhanced project management solution integrated directly into Microsoft Teams.

2. Trello

Pricing: Free, advanced features from $10/user/month
Best for: Simple project needs and visual task management.
Trello’s strength lies in its simplicity and visual approach to task management. As a task management software, it offers customizable boards, lists, and cards, making it adaptable to various workflows. Trello also integrates with many third-party tools, such as Slack and Google Drive, and provides power-ups for additional functionality like time tracking and automation.

Key Features:

  • Intuitive Kanban boards
  • Power-Ups for extended functionality
  • Automation with Butler
  • Calendar and timeline views (in paid plans)

3. Jira

Pricing: Free, advanced features from $6/user/month
Best for: Agile project management and software development teams.
Jira is a powerful tool for teams using Agile methodologies. It offers customizable workflows, Agile boards, and sprint planning features. Jira’s flexibility allows teams to tailor the platform to their specific project needs, and it integrates with other tools like GitHub and Bitbucket for seamless collaboration. Jira also supports visualizing project timelines with Gantt charts and other tools, enabling teams to effectively plan and track complex projects.

Key Features:

  • Supports Agile methodologies such as Scrum and Kanban
  • Customizable workflows, dashboards, and reports
  • Advanced project management features like sprint planning, backlog management, and issue tracking
  • Integration with development tools like GitHub and Bitbucket
  • Additional Features: Custom fields, automation rules, and extensive third-party integrations for enhanced functionality

 4. Zoho Projects

Pricing: Free, advanced features from $5/user/month
Best for: Upgrading tech stacks and managing complex projects.
Zoho Projects is part of the larger Zoho suite, making it an excellent option for teams already using Zoho apps. This project management software offers advanced reporting, task dependencies, and time-tracking features, making it ideal for teams that need detailed project management capabilities.

Key Features:

  • Multiple work views including Gantt charts and Kanban boards
  • Task dependencies and subtasks for complex project management
  • Time tracking and billing features
  • Advanced reporting and analytics
  • Additional Features: Seamless integration with Zoho’s other apps, such as Zoho CRM and Zoho Analytics, as well as third-party tools like Google Drive and Slack

5. Basecamp

Pricing: $15/user/month or $299/month for unlimited users
Best for: Large teams and enterprises.
Basecamp is a popular Microsoft Planner alternative designed for collaboration, offering tools like to-do lists, file sharing, and messaging in one platform. It’s an excellent choice for large teams that need a simple and intuitive tool to keep everyone aligned on projects.

Key Features:

  • To-do lists, file sharing, and real-time messaging all in one platform
  • Centralized project organization with a user-friendly interface
  • Scheduling and task assignment features
  • Additional Features: Flat-rate pricing for large teams and the ability to invite guests for free collaboration on projects

6. ClickUp

Pricing: Free, advanced features from $7/user/month
Best for: Customization and scalability.
ClickUp offers a range of views, including Kanban, list, and Gantt charts, making it highly customizable for various project needs. As one of the leading project management tools, it also provides task automation, integrations with numerous apps, and powerful reporting tools, making it a versatile choice for teams of all sizes.

Key Features:

  • Multiple views: Kanban boards, lists, Gantt charts, calendars, and more
  • Customizable workflows and statuses
  • Powerful reporting and analytics tools
  • Time tracking and resource management
  • AI-powered writing and editing assistance

Conclusion 

Selecting the appropriate project management tool hinges on your team’s specific requirements. Whether you value user-friendliness, robust functionalities, or seamless integration with other software, numerous alternatives to Microsoft Planner can boost your productivity and teamwork. Assess your needs, experiment with different tools, and choose the one that best fits your workflow to achieve optimal team performance. A project manager plays a crucial role in selecting the right tool to ensure effective planning, collaboration, and functionality.

Try Trovve on Microsoft Teams free for 7 days – no credit card required

FAQs

1. Why should I consider alternatives to Microsoft Planner?

While Microsoft Planner offers basic task management within the Microsoft 365 suite, it may lack the advanced features and flexibility required for more complex projects. Teams often seek alternatives for better collaboration tools, more customization options, and advanced project views such as Gantt charts.

2. What are some of the limitations of Microsoft Planner?

Microsoft Planner is limited in its views (primarily Kanban-based), lacks Gantt charts for timeline visualization, has a basic notification system, and does not support advanced features like recurring tasks or critical path analysis. These limitations may make it less suitable for teams managing complex projects.

3. Which project management tool is best for teams using Microsoft Teams?

Trovve is an excellent choice for teams using Microsoft Teams. It integrates seamlessly within the Teams environment and offers AI-powered task management, making it ideal for project managers and team leaders in project-centric industries like Construction and Technology.

4. What makes Trello a suitable alternative to Microsoft Planner?

Trello is an ideal task management tool for teams that need a simple, visual approach to task management. Its intuitive Kanban boards, Power-Ups for extended functionality, and automation features make it a strong alternative, especially for teams looking for ease of use.

5. How does Jira support Agile project management?

Jira is designed for Agile methodologies like Scrum and Kanban. It offers customizable workflows, sprint planning, backlog management, and integration with development tools like GitHub, making it a top choice for software development teams.

6. What makes Zoho Projects suitable for complex project management?

Zoho Projects offers advanced features such as Gantt charts, task dependencies, time tracking, and detailed reporting. It also integrates seamlessly with other Zoho apps and third-party tools, making it a strong option for teams managing complex projects and upgrading their tech stacks.

7. Is Basecamp an excellent choice for large teams?

Yes, Basecamp is designed for large teams and enterprises. It provides a centralized platform for collaboration with tools like to-do lists, file sharing, and real-time messaging. Its flat-rate pricing model also makes it cost-effective for large teams.

8. How customizable is ClickUp as a project management tool?

ClickUp is highly customizable, offering multiple views (Kanban, list, Gantt, and more) and customizable workflows and statuses. It also supports task automation, extensive integrations, and powerful reporting, making it suitable for teams of all sizes.

9. Can I try Trovve for free?

Yes, Trovve offers a 7-day free trial on Microsoft Teams, with no credit card required, allowing you to explore its features before committing to a subscription.

10. How do I choose the best Microsoft Planner alternative for my team?

To choose the best alternative, assess your team’s specific needs, such as required features, integration capabilities, ease of use, and budget. Many tools offer free trials or plans, letting you test them before deciding.

How to Master Project Management in Microsoft Teams: Top Task Management Features and Tips

Project management within Microsoft Teams goes far beyond simply organizing tasks; it’s a comprehensive approach to driving productivity, enhancing team collaboration, and ensuring projects are delivered on time. Whether you’re a small business or a large enterprise, choosing the right project management application for Microsoft Teams is critical. The tools you select should integrate seamlessly with the platform and meet your team’s specific needs. 

Two standout options available in the Microsoft Teams marketplace are Microsoft Planner and Trovve. Both tools offer robust task management features, with Trovve combining the simplicity of a user-friendly interface with the power of AI. This article will explore how these tools, especially in the context of Microsoft Teams, can help you master project management and optimize your workflow. 

How to Download and Set Up Microsoft Teams

Downloading Teams for Different Platforms

  • Windows: 
  1. Visit the Microsoft Teams Download Page. 
  2. Click on “Download for Desktop.” 
  3. Run the installer and follow the on-screen instructions. 
  • Mac: 
  1. Navigate to the Teams Download Page. 
  2. Select “Download for Desktop.” 
  3. Open the downloaded file and follow the installation steps. 
  • Mobile Devices: 
  1. iOS: Download Teams from the App Store. 
  2. Android: Download Teams from the Google Play Store. 

Step-by-Step Setup Process

  1. Sign in: Open Microsoft Teams and sign in with your Microsoft 365 account (ensure you use your business or school account). If you don’t have one, you can create an account during this step. 
  2. Set Up Teams: Follow the setup wizard to configure your preferences, such as notifications and theme settings. 
  3. Join or Create Teams: Start by joining an existing team or creating a new one to begin collaborating. 

System Requirements

To ensure smooth performance, make sure your system meets the following requirements: 

  • Windows: Windows 10 or later, 4 GB of RAM, 1.6 GHz processor. 
  • Mac: macOS 10.14 or later, 4 GB of RAM, 1.6 GHz processor. 
  • Mobile Devices: iOS 11.0 or later, Android 5.0 or later. 

Troubleshooting Common Installation Issues

If you encounter any problems during installation, here are some quick fixes: 

  • Installation Fails: Ensure that your system meets the minimum requirements and that you have administrative privileges. 
  • Can’t Sign In: Double-check your Microsoft 365 credentials or reset your password. 
  • Performance Issues: Close unnecessary applications, update your operating system, and ensure your internet connection is stable. 

Now that you have Microsoft Teams set up and ready to go, it’s time to explore the top task management features and tips to help you master project management within the platform. 

1. Integrated Task Management and AI-Powered Planning

Centralizing all your tasks within Microsoft Teams is essential for team efficiency and project success. Microsoft Planner and Trovve are designed to offer seamless integration, making it easier to manage your projects without switching between multiple platforms. 

  • Microsoft Planner: Microsoft Planner is well-known for its straightforward task management capabilities, where you can easily set durations, deadlines, and assign tasks. It’s an ideal solution for teams that need a simple, effective tool to keep track of their work within Microsoft Teams. 
  • Trovve: While Trovve provides the same simplicity, it takes task management to the next level by integrating AI-powered planning. This feature offers automated task generation, intelligent suggestions, and personalized task prioritization, making it perfect for teams that need a balance between ease of use and advanced capabilities.

Best For: 

  • Microsoft Planner: Ideal for teams looking for basic, no-frills task management within Microsoft Teams. 
  • Trovve: Suitable for teams that want to enhance their project management with AI-driven features, ensuring more efficient planning and execution. 

2. Seamless File Management and Organization

Effective file management is crucial for any project. Both Microsoft Planner and Trovve integrate with OneDrive and SharePoint, ensuring your documents are always accessible and organized. Learn how to manage project documents effectively within Teams using these integrated tools. 

  • Microsoft Planner: Offers basic file attachment capabilities, allowing you to link files directly to tasks within Microsoft Teams. This straightforward approach is perfect for teams that need a reliable way to keep their project documents in one place. 
  • Trovve: Trovve retains this simplicity but adds AI-powered file organization, making it easier to categorize and locate important documents. Whether you’re dealing with a few files or a large repository, Trovve’s intelligent file management system ensures everything is where you need it, without the complexity. 

Best For: 

  • Microsoft Planner: Teams that require basic file management without needing advanced features. 
  • Trovve: Teams that handle large volumes of documents and need a more sophisticated, yet simple, system to keep everything organized. 

3. Advanced Project Planning and Real-Time Tracking

Keeping projects on track is a priority for any team. Microsoft Planner and Trovve both offer project planning and tracking capabilities, but Trovve stands out with more advanced features that don’t compromise on ease of use. For tips on maximizing Microsoft Planner’s potential, consider these best practices. 

  • Microsoft Planner: Provides basic project views like grid and board, which are suitable for straightforward project tracking. These views help teams visualize their tasks and progress, making it easier to stay on top of deadlines. 
  • Trovve: While offering similar views, Trovve includes AI-generated project setups, detailed tracking, and real-time reporting. These features allow project managers to monitor progress closely and adjust on the fly, ensuring that projects stay aligned with goals. 

Best For: 

  • Microsoft Planner: Teams with simpler project management needs and a preference for a straightforward tool. 
  • Trovve: Teams looking for a powerful tool that combines simplicity with advanced AI-driven project management features. 

4. Personalized Work Management

Personalized task and time management are key to improving productivity. Both Microsoft Planner and Trovve offer tools to help manage your day effectively, but Trovve’s AI-driven features provide an enhanced experience. 

  • Microsoft Planner: Offers basic task prioritization features, allowing users to manage their day within Teams. This functionality is perfect for individuals who prefer a simple, easy-to-use tool to keep track of their daily tasks. 
  • Trovve: Trovve takes personalization further by integrating AI-driven task prioritization and customizable day planning. This feature integrates your tasks, meetings, and deadlines into a simple, intuitive interface, making advanced personal management accessible to all team members. 

Best For: 

  • Microsoft Planner: Individuals and teams that need basic task management without additional features. 
  • Trovve: Teams that want a user-friendly tool with powerful, AI-enhanced personal management capabilities to optimize their day-to-day work. 

5. Enhanced Team Collaboration and Visibility

Collaboration and visibility are crucial for project success. While Microsoft Planner offers essential collaboration features, Trovve provides more advanced tools without sacrificing ease of use, ensuring your team stays connected and informed throughout the project lifecycle. 

  • Microsoft Planner: Provides essential task tracking and visibility features, allowing teams to stay on the same page. This includes basic sharing and commenting functionalities, which are sufficient for straightforward projects. 
  • Trovve: Excels with real-time availability tracking, AI-generated daily reports, and a comprehensive dashboard. These features are presented in an easy-to-use format that ensures teams have full visibility into project progress without any unnecessary complexity. 

Best For: 

  • Microsoft Planner: Teams that need basic collaboration tools within Microsoft Teams. 
  • Trovve: Teams that require detailed collaboration and reporting features in an intuitive, easy-to-use platform. 

6. Seamless Integration with Microsoft Teams

For teams using Microsoft Teams, ensuring that your project management tool integrates seamlessly with the platform is key to maintaining workflow efficiency. Microsoft Planner is already a built-in feature within Teams, providing an effortless way to manage tasks. However, if you’re searching for more advanced features, Trovve offers a compelling alternative. 

  • Microsoft Planner: Fully integrated with Microsoft Teams, making it an ideal choice for those who want a simple setup without the need for additional configuration. Click here to learn more about getting started with Planner in Teams. 
  • Trovve: Also integrates seamlessly with Teams and adds AI capabilities, giving you more options for automation and advanced task management. This integration ensures that you can manage projects more effectively without disrupting your existing processes. 

Best For: 

  • Microsoft Planner: Teams that want out-of-the-box task management that ties directly into Microsoft Teams. 
  • Trovve: Teams looking to extend the functionality of Microsoft Planner with AI-driven enhancements for a more powerful project management experience. 

Conclusion

Mastering project management in Microsoft Teams is about more than just managing tasks—it’s about optimizing your entire workflow for efficiency, collaboration, and success. The choice between Microsoft Planner and Trovve depends on the specific needs of your team. 

Microsoft Planner is a reliable, straightforward tool that integrates smoothly with Microsoft Teams, making it a good option for teams looking for essential task management features. However, if your team needs more than just the basics, Trovve offers a user-friendly experience combined with powerful AI-driven capabilities, making it ideal for teams that want both simplicity and advanced features. 

By leveraging the right tools and features, you can elevate your project management practices within Microsoft Teams, ensuring your team stays productive and your projects are delivered on time. 

FAQ Section

1. What is the best project management tool for Microsoft Teams?

Microsoft Teams offers several project management tools, including Microsoft Planner and Trovve. Microsoft Planner is ideal for teams that need a simple, straightforward task management solution integrated within Teams. Trovve, on the other hand, provides advanced AI-driven features that enhance project planning and task management, making it a better choice for teams that require more robust functionality.

2. How does Microsoft Planner integrate with Microsoft Teams?

Microsoft Planner is fully integrated with Microsoft Teams, allowing users to create and manage tasks directly within Teams channels. This seamless integration means that team members can collaborate on tasks, set deadlines, and track progress without leaving the Teams environment. It’s an excellent option for teams looking for basic task management.

3. What are the benefits of using Trovve over Microsoft Planner?

Trovve offers all the basic functionalities of Microsoft Planner but adds powerful AI-driven features that help with automated task generation, intelligent suggestions, and real-time project tracking. It’s particularly beneficial for teams that require advanced project management features while still maintaining ease of use.

4. Can Microsoft Planner be used for project management?

Yes, Microsoft Planner is a versatile tool that can be used for project management within Microsoft Teams. It allows teams to create plans, assign tasks, set deadlines, and track progress. While it’s more suited for straightforward project management, it can be highly effective for teams with simpler needs.

5. How do I manage tasks in Microsoft Teams?

Tasks in Microsoft Teams can be managed using tools like Microsoft Planner or Trovve. With Microsoft Planner, you can create tasks, set due dates, assign them to team members, and track their progress within Teams channels. Trovve enhances this by adding AI-driven task management and advanced planning capabilities, making it easier to manage complex projects.

6. What is the difference between Microsoft Planner and Trovve?

The primary difference lies in the level of functionality and ease of use. Microsoft Planner is designed for basic task management, making it ideal for teams that need a simple tool. Trovve offers additional features like AI-driven planning, automated task generation, and real-time project tracking, making it suitable for teams with more complex project management needs.

7. Is Trovve compatible with SharePoint and OneDrive?

Yes, Trovve integrates seamlessly with both SharePoint and OneDrive. This integration allows for efficient file management and organization, ensuring that all project documents are easily accessible and well-organized. Trovve also adds AI-driven features to help categorize and manage files effectively.

8. How can AI improve project management in Microsoft Teams?

AI can significantly enhance project management in Microsoft Teams by automating repetitive tasks, providing intelligent suggestions for task prioritization, and offering real-time insights into project progress. Tools like Trovve leverage AI to streamline project planning and execution, making it easier to manage complex tasks and projects.

9. What are the top features to look for in a project management tool for Microsoft Teams?

When choosing a project management tool for Microsoft Teams, look for features such as seamless integration with Teams, task management capabilities, file management, real-time tracking, and AI-driven planning. Both Microsoft Planner and Trovve offer these features, with Trovve providing more advanced options for teams with complex needs.

10. Can I use Microsoft Planner for large projects?

While Microsoft Planner can be used for large projects, it is better suited for smaller or less complex projects due to its straightforward task management features. For larger projects requiring more detailed planning and tracking, Trovve might be a better option, thanks to its advanced AI-driven features.

How to Convert Screenshots to Tasks in 5 Minutes with Trovve AI and Windows Snipping Tool

Using AI image to text features can improve your efficiency by turning screenshots into tasks that you can act on. With Trovve AI and the Windows snipping tool, you can make sure that nothing important gets missed. Let’s explore how you can use these tools to simplify your workflow and increase productivity. 

Converting images to Text with Windows Snipping Tool

The Windows snipping tool now includes a feature that allows you to extract text from images. Here’s how you can use it: 

Open the Snipping Tool:

  • Press the Windows key and type “Snipping Tool” to open it.
  • Alternatively, use the shortcut Windows + Shift + S to launch it directly.

Capture Your Screenshot:

  • Click on New to start a new snip.
  • Ensure the snip type is set to Rectangular Snip.
  • Highlight the text area you want to capture.

Convert Image to Text:

  • After capturing the text, click on the Text Actions icon.
  • The tool will convert the text in the image to editable text.
  • Click on Copy all text to copy the converted text to your clipboard.

Snipping tool

AI image to text

sniping tool- Copy all text

AI image to text

Now that you have your text, let’s move it into Trovve AI to generate tasks. 

Using Trovve AI to Turn Text into Tasks

In Trovve, the process of creating tasks from your captured text is straightforward. Follow these steps from the My Day screen:

Access the Ask AI Feature:

  • Click on the Ask AI button.
  • Select Generate Tasks from the options.

Generate task drop down

AI image to text

Enter Your Task Information:

  • Paste the copied text into the input field.
  • Set the start and end dates for the task completion range.
  • Assign the task to a specific project if needed.
  • Set an assignee if you want to assign the task to a particular person.

Task generator pop up

Generate and Add Tasks:

  • Click on Generate.
  • Review the list of generated tasks.
  • Select the tasks you want to keep.
  • Click Add to Project to assign them to a project or choose Add to My Day/To-Do if the tasks are for the current user.

Generated task

Practical Use Cases and Sample Prompts

Here are some practical use cases for using Trovve AI’s AI image to text conversion capabilities and the Windows snipping tool, along with sample prompts to help you get started: 

1. Transform Handwritten Notes into Actionable Tasks

Scenario: During a brainstorming session, ideas are noted on a whiteboard.

  • Prompt: “Convert the following brainstorming session notes into actionable tasks: Review marketing strategy, Update website content, Schedule team meeting, Design new product brochure.”
  • Value: Digitize spontaneous ideas, ensuring they are organized and actionable.

2. Convert Webinar Screenshots to Action Items

Scenario: Key points are displayed on screen during an online seminar.

  • Prompt: “Create tasks from these webinar takeaways: Implement new software update, Train staff on new features, Review customer feedback, Plan follow-up webinar.”
  • Value: Turn real-time insights into immediate actions, improving follow-through and productivity.

3. Extract Tasks from Images in Emails or Documents

Scenario: Emails and documents sometimes include images with crucial text.

  • Prompt: “Generate tasks from the following image content: Complete project report, contact supplier for quotes, Prepare presentation slides, Review budget proposal.”
  • Value: Ensure vital information embedded in images is not overlooked and becomes actionable.

4. Turn Client Feedback into Improvement Tasks

Scenario: Client feedback often comes as screenshots in emails or chats.

  • Prompt: “Create improvement tasks from client feedback: Fix login issues, Enhance mobile app interface, Add new payment options, Improve customer support response time.”
  • Value: Quickly translate client feedback into tasks, enhancing customer satisfaction and improving service.

5. Make Non-Editable PDF Content Actionable

Scenario: Important points are embedded in non-editable PDFs.

  • Prompt: “Generate tasks from these PDF highlights: Update project timeline, review legal contract, organize team workshop, Analyze sales data.”
  • Value: Ensure static PDF content is turned into actionable tasks, facilitating better project planning and execution.

Conclusion

By leveraging the AI image to text feature of the Windows snipping tool and Trovve AI’s task generation, you can significantly enhance your productivity. No more losing valuable insights or spending extra time manually entering tasks. Start converting your screenshots into actionable tasks today and see the difference in your workflow efficiency. Use these tools to ensure that every piece of information is captured, organized, and acted upon effectively, making your work process smoother and more efficient. 

With the Windows snipping tool’s AI image to text feature and Trovve AI’s task generation, you can boost your productivity. No more missing important insights or wasting time manually entering tasks. Turn your screenshots into tasks today with Trovve for free for 7 days and see how it can help you collect, manage, and use every piece of information better, making your work process easier and faster. 


Drafting and writing blog copy: Microsoft Co-pilot & Microsoft word

This article continues from the previous one, ‘The Future of Blogging: From Ideas to Articles with Trovve AI and Microsoft Co-pilot ‘, which covers topics like: 

Trovve AI and Microsoft Co-pilot as blogging tools: How these two tools can help you blog faster, easier, and better, by managing your projects, generating content ideas, and assisting your writing. 

Setting up your blogging project: How to create your blogging project in Trovve, by adding project details, picking team members, and choosing a file storage location. 

Choosing and researching blog topics: How to pick topics that suit your business, by knowing your audience, matching your business goals, using your expertise, checking competitors, and listening to customers. It also recommends tools and ways to research topics, such as keyword research tools, competitor analysis, and search engine trends. 

Generating and managing blog content: How to use Trovve AI to produce and generate blog titles, make checklists, and assign blog tasks. It also briefly shows how to use Microsoft Co-pilot to draft and write the blog. 

How to use Microsoft Co-Pilot in Word

It’s important to know how to use Microsoft Co-pilot in Microsoft Word. There are two parts: the in editor co-pilot and the document analysis co-pilot. When you click on the main part of the word document, you will see an icon like the one below. It can help you write a copy in the document. The document analysis co-pilot is in the tool bar. You can use it for things like summarizing the document and getting insights like answering specific questions.

Co-Pilot icon

Co-Pilot icon for document analysis

Creating an outline with Microsoft Co-Pilot

One of the most important steps in writing a blog is creating a structured outline. An outline helps you organize your main points and sub-points in a logical and coherent way. It also helps you avoid repetition, confusion, and tangents in your blog content. Moreover, an outline helps you save time and effort by providing a clear roadmap for your writing process. Finally, an outline helps you align your blog content with your purpose, audience, and tone. 

Creating a blog outline can be challenging, especially if you are not sure what to include or how to structure it. That’s why using Microsoft Co-pilot can help you generate a high-quality outline in minutes. Co-pilot is a powerful AI tool that can assist you in creating content for various purposes and domains. Co-pilot can generate an outline based on your title, word count, and keywords. Here are the steps to create a blog outline with Co-pilot: 

  1. Click on the Co-pilot icon in the body of the Word document.
  2. Write a prompt that describes what you would like to do. For example, [Act as a content writer and write a blog outline for 1500 words with the title “How to write a blog with Co-pilot”]. You can also include some keywords or key phrases that you want to use in your blog content. Here is an example:
Microsoft Co-pilot
  1. Press generate and wait for Microsoft Co-pilot to generate an outline for your blog. The outline will consist of a list of headings and subheadings, each with a brief description of what to include in that section. For example: 

            – Introduce the topic of writing a blog with Co-pilot 

            – Explain the benefits of using Co-pilot for blogging 

            – Provide a thesis statement that summarizes the main points of the blog 

Tip: To use a SharePoint or OneDrive document as reference material, you can either type ‘/ ‘and the file name or click on the file icon and browse SharePoint or OneDrive. You can add up to 3 documents.  

Once you have the outline, you can use Co-pilot to draft each section of your blog. To do this, highlight each heading and subheading, along with a brief description of what to include in this section and write a prompt to write that section. 

Generating Blog content from outline with Microsoft Co-Pilot

Longer blogs perform better on search engines, but AI writers often produce very short blog posts that are below 700 words. To generate longer blog copy, one technique is to do it section by section. To improve SEO, it is also important that the phrase is included in the first sentence of the blog, so we created a special prompt template you can use. 

To write each section’s introduction: 

  • Select one section from the outline 
  • Click on the Microsoft Co-Pilot icon and choose ‘write prompt’ 
  • Click on the generate button to get Co-Pilot to generate copy 
  • If you don’t like the copy, you can add more instructions Ex. Rewrite and include subheadings where relevant 
  • If you need to edit your original prompt, just click on the pencil icon 
  • Repeat for each section. 
Microsoft Co-pilot

Note: (Each time you generate a new section of the blog co-pilot inserts it under the old heading and description. You must delete the old section before you move on to the next.) 

Prompts for writing Copy

Introduction

 Compose the introduction section of the blog, and make sure to use the key phrase [key phrase] in the first sentence of the opening to clarify the point right away. Don’t use ordinary words that Ai often uses or dull, impersonal copy, aim for something original and captivating. 

Main Body

Write this section of the blog, include key phrase [key phrase] into sentences where relevant for SEO (Do not overuse). Don’t use ordinary words that Ai often uses or dull, impersonal copy, aim for something original and captivating. 

Conclusion

Write conclusion section of the blog, include key [CTA]. Don’t use ordinary words that Ai often uses or dull, impersonal copy, aim for something original and captivating 

Generating an FAQ

FAQs are great for SEO, and they also help answer readers’ questions especially when they did not take the time to read the whole blog. To generate an FAQ: 

  • Create heading called FAQs at the bottom of the article  
  • Then click below the heading and click on the Microsoft Co-pilot icon  
  • Write a prompt that describes what you would like to do.  

FAQs prompt

Create a detailed list of FAQs for this article. Make sure the answers are clear and simple to understand for an audience unfamiliar with the topic. Think of questions the reader might have but only use answers based on the article. 

Final Thoughts

Writing a blog post can be a daunting task, especially if you are not sure how to structure your content, optimize it for SEO, and engage your readers. Fortunately, you don’t have to do it alone. With Microsoft Co-Pilot and Microsoft Word, you can get help from a powerful AI assistant that can generate copy, suggest ideas, and check your grammar and spelling. Co-Pilot can also create a detailed list of FAQs for your article, which can boost your SEO ranking and answer your readers’ questions. All you need to do is write a prompt that describes what you want Co-Pilot to do, and then click on the generate button. You can also edit your original prompt or the generated copy anytime you want. Co-Pilot and Word are the perfect tools for creating captivating and effective blog posts. Try them today and see the difference they can make for your writing. 


The Future of Blogging: From Ideas to Articles with Trovve AI and Microsoft Co-pilot

The future of blogging has come a long way since its inception in the late 1990s. Originally, blogs were simple online journals where individuals shared their thoughts, experiences, and personal stories. As the internet evolved, so did blogging. It transformed from a niche activity to a mainstream platform for sharing information, opinions, and expertise across diverse topics. Today, blogs are integral to digital marketing strategies, personal branding, and knowledge sharing. 

The rise of content management systems (CMS) like WordPress and Blogger made it easier for anyone to start a blog without needing extensive technical skills. As a result, blogging became more accessible, leading to an explosion of content on the web. Over time, blogs have become more sophisticated, incorporating multimedia elements like images, videos, and infographics to engage readers better. The focus has also shifted from personal narratives to more structured, informative, and value-driven content aimed at educating and engaging specific audiences. 

Overview of the Role of AI in Modern Blogging

Recently artificial intelligence (AI) has started to play a significant role in modern blogging. AI technologies are revolutionizing how content is created, optimized, and distributed, shaping the future of blogging. AI tools can analyze vast amounts of data to identify trending topics, suggest relevant keywords, and even generate content ideas. This helps bloggers and content creators stay ahead of the curve by producing timely and relevant content that resonates with their audience. 

AI-powered writing assistants, like Microsoft Co-pilot, can help draft, edit, and refine blog posts, ensuring they are well-structured and free of grammatical errors. These tools can also optimize content for search engines, increasing their visibility and reach. Moreover, AI can personalize content recommendations, making it easier for readers to find and engage with the most relevant blog posts. 

Introduction to Trovve AI and Microsoft Co-pilot: Shaping the Future of Blogging

Trovve AI and Microsoft Co-pilot are two powerful tools that are transforming the blogging landscape and shaping the future of blogging. Trovve AI is designed to streamline project management for bloggers, helping them organize their content creation process efficiently. From generating blog titles to creating checklists and managing tasks, Trovve AI simplifies the workflow, allowing bloggers to focus more on creativity and less on administrative tasks. 

Microsoft Co-pilot, on the other hand, serves as a comprehensive writing assistant. It helps bloggers draft outlines, write content, and optimize their posts for SEO. Co-pilot can suggest key phrases, recommend links, and even help generate FAQs based on the blog content. By integrating these tools into their blogging process, content creators can enhance their productivity, improve content quality, and ensure their blogs are both engaging and optimized for search engines. 

Together, Trovve AI and Microsoft Co-pilot offer a seamless, efficient, and innovative approach to blogging, making it easier than ever to go from ideas to well-crafted articles. 

Setting Up Your Blogging Project: Laying the Foundation for the Future of Blogging

Importance of Organizing Your Project

Effective organization is crucial for the success of any blogging project. When your project is well-organized, you can manage your time more efficiently, track your progress, and ensure that all necessary tasks are completed on schedule. Good organization helps prevent key details from slipping through the cracks and keeps you focused on your blogging goals. By having a structured plan, you can streamline your workflow, collaborate more effectively with team members, and produce higher-quality content, setting the stage for the future of blogging. 

Steps to Set Up Your Project in Trovve

To create a project in Trovve, navigate to the project section and click on “New Project.” 

Enter Project Details: 

  • Project Name: Enter a descriptive project name, such as “3 QTR Blogs” to align with your campaign. 
  • Get Ideas: You can use Trovve AI to generate project name ideas by clicking on “Get Ideas.” 
  • Dates and Description: Fill out the start and end dates for your project. For the project description, you can use Trovve AI to generate content by clicking on “Help Me Write.” 
Future of Blogging

Select Team Members: 

  • Choose the team members who will be involved in the project, such as copywriters, designers, and social media managers. Assign appropriate roles and permissions to each team member. 
Future of Blogging

Select File Storage Location: 

  • Choose Location: Select a storage location in SharePoint or OneDrive. It is recommended to organize your blogs by campaign or project name. 
  • Organize Subfolders: Create subfolders within your selected storage location: one for articles and another for images. 
  • Set Default Folder: Choose these two subfolders as your project folders and set the articles folder as your default folder. 
Future of Blogging

By following these steps, you can set up your blogging project in Trovve efficiently. This structured approach ensures all team members are aligned and that your content is well-managed and easily accessible throughout the blogging process, paving the way for the future of blogging. 

Choosing and Researching Blog Topics: Pioneering the Future of Blogging

How to Select Relevant Topics for Your Business

Selecting relevant blog topics is essential for engaging your audience and driving traffic to your website. To choose topics that resonate with your business and contribute to the future of blogging, consider the following steps: 

  • Identify Your Audience: Understand who your target readers are. Consider their interests, challenges, and the type of information they seek. 
  • Align with Business Goals: Choose topics that align with your business objectives. Whether it’s promoting a product, educating your audience, or establishing thought leadership, your blog topics should support these goals. 
  • Leverage Your Expertise: Focus on areas where your business has expertise. Sharing in-depth knowledge and insights can position you as an authority in your industry. 
  • Analyze Competitors: Look at what topics your competitors are covering. This can help you identify gaps in content and opportunities to provide unique value. 
  • Use Customer Feedback: Pay attention to questions and feedback from your customers. This can be a goldmine for relevant blog topics. 

Example Topic: “File Management in Microsoft 365”

An example of a relevant topic for businesses using Microsoft 365 is “File Management in Microsoft 365.” This topic can address common challenges, best practices, and tips for efficiently managing files within the Microsoft 365 ecosystem. 

Importance of Understanding Search Traffic and Ranking Difficulty

Before investing time in writing a blog post, it’s crucial to understand the potential search traffic and the difficulty of ranking for the chosen topic. This helps ensure your efforts are directed toward topics that can drive significant organic traffic to your website and contribute to the future of blogging. 

  • Search Traffic: High search traffic indicates that many people are interested in the topic, which can lead to more visits to your blog. 
  • Ranking Difficulty: Knowing how hard it is to rank for a topic helps you gauge the competition. Targeting keywords with moderate difficulty can yield better results, especially if your website is not yet highly authoritative. 

Tools and Methods for Conducting Topic Research

To effectively research traffic and ranking difficulty, you can use a variety of tools and methods: 

Keyword Research Tools: 

  • Google Keyword Planner: Provides keyword ideas and search volume estimates. 
  • Ahrefs: Offers insights into keyword difficulty, search volume, and competitor analysis. 
  • SEMrush: Helps identify keyword opportunities and analyze search trends. 

Analyze Competitor Content: 

  • Look at the top-ranking articles for your chosen topic. 
  • Assess the quality and depth of their content. 
  • Identify gaps that you can fill with your blog post. 

Search Engine Trends: 

  • Use Google Trends to see how the interest in your topic changes over time. 
  • Identify seasonal trends and plan your content calendar accordingly. 

By thoroughly researching your blog topics and understanding the search landscape, you can create content that not only attracts readers but also ranks well in search engine results. This strategic approach, aligned with the future of blogging, ensures your blogging efforts contribute to your overall business goals. 

Generating and Managing Blog Content

Using Trovve AI to Brainstorm and Generate Blog Titles

Trovve AI can significantly streamline the process of brainstorming and generating blog titles. Here’s how you can use Trovve AI to efficiently create engaging blog titles: 

Initiate the Process: 

  • Go back to the project you set up earlier in Trovve. 
  • Click on “Generate Task with AI,” either from the empty screen or the “Add New Item” screen. 
Future of Blogging

Enter Blog Information: 

  • In the pop-up window, select “Custom Tasks.” 
  • Enter the information about the blogs you want to create based on your research. For example, you might input: “Suggest 10 engaging blog titles related to and optimized for [topic].” 

Future of Blogging

Set Dates (Optional): 

  • If you plan to use more than one of the suggested titles, you can set the task start and end dates so the AI can schedule them automatically. 
Future of Blogging

Generate and Select Titles: 

  • Click on “Generate.” Trovve AI will provide a list of blog titles. 
  • Select the ones you want to use and click “Add to Project.” This action will add the chosen titles as tasks to your project. 
Future of Blogging

Assign Blog Tasks: 

  • Within the project, click on the three dots on the project tool bar  
  • Choose the blog tasks and bulk assign them if needed. Assignees of these tasks will see them in their “To-Do” list and in their “Today” tab based on the start and end dates selected. If no dates are selected, Trovve AI will suggest tasks to the assignee based on their workload and task priorities. 
  • Users can add the tasks to their list when they are ready to work on them. 

Importance of Having a Checklist for Blog Writing

Having a checklist is essential for ensuring that all necessary steps in the blog writing process are completed. A checklist helps maintain consistency, quality, and thoroughness in your blog posts. You can use Trovve Ai to generate a checklist There are two options: “Generate Steps to Do the Task” or “Use Checklist based on similar Tasks. 

If you choose to create a check list manually then all steps are covered. Define all the key steps involved in creating your blog post, from drafting, image creation to publishing and promoting on social media etc. One tip is to create the checklist once for one blog and use the generate checklist feature in Trovve with option to use suggest from similar tasks. This will search for other blog tasks and copy the checklist to the current task, facilitating the future of blogging by streamlining your workflow. 

Generating checklist – AI Generated

Generating checklist – Add all to task 

Conclusion

Trovve is a powerful project management tool that helps you and your team handle the blog writing process with easy integration with SharePoint, OneDrive and Co-pilot. Trovve Ai makes it easier to create appealing blog titles and turn them into tasks and checklists so you and your team can work effectively. In the next article we will demonstrate how you can generate your blog content with Microsoft co-pilot & Word 

Read the next article Drafting and writing blog copy: Microsoft Co-pilot & Microsoft word 


Streamline Your Workflow: 5 SharePoint File Management Tips for Boosted Productivity

SharePoint file management is a powerful and versatile way to organize, manage, and share files in your organization. Whether you need to collaborate on documents, secure sensitive information, or integrate with other applications, SharePoint can help you streamline your workflow and boost your productivity. 

However, SharePoint file management also comes with its own challenges and frustrations. How do you navigate through the complex and sometimes confusing structure of libraries, lists, folders, and subfolders? How do you avoid creating and storing duplicate or outdated files? How do you keep track of the changes and versions of your files? How do you control who can access and edit your files? 

In this blog post, we will share with you five practical and easy-to-follow tips to help you overcome these challenges and make the most of SharePoint file management. You will learn how to use metadata, views, folders, co-authoring, and permissions to find, sort, display, collaborate, and secure your files in SharePoint. By following these tips, you will be able to work with files in SharePoint more efficiently and effectively. 

Tip 1: Use metadata in SharePoint File Management to categorize and filter files

Metadata is information that describes the content, context, or characteristics of a file, such as document type, project name, or author. Metadata can help you add more details and meaning to your files in SharePoint, making them easier to find, sort, and filter. 

For example, if you have a SharePoint library that contains files related to different projects, you can use metadata to assign each file a project name, a status, and a due date. This way, you can quickly filter the files by project name, see which files are in progress or completed, and sort them by due date. 

To use metadata to categorize and filter files in SharePoint, you need to create and apply metadata columns to your files. Here are the steps to do that: 

  1. Go to the SharePoint library or list where you want to add metadata columns. 
  2. Click on the Settings icon and select Library settings or List settings. 
  3. Under the Columns section, click on Create column. 
  4. Enter a name and a description for your column. 
  5. Select the type of information you want to store in your column, such as text, number, date, or choice. 
  6. Depending on the type of information, you may need to enter additional options, such as the format, the default value, or the choices. 
  7. Under the Additional Column Settings section, you can choose whether the column is required, whether it is unique, and whether it is indexed. 
  8. Click OK to create your column. 
  9. Repeat the steps for each metadata column you want to create. 
  10. To apply metadata to your files, go to the SharePoint library or list and select the files you want to edit. 
  11. Click on the Edit icon or select Edit properties from the menu. 
  12. Enter the metadata values for each column and click Save. 

Now you can use the metadata columns to filter, sort, and group your files in SharePoint. To do that, go to the SharePoint library or list and click on the column header. You will see a drop-down menu that allows you to filter by a specific value, sort in ascending or descending order, or group by the column. 

Using metadata to categorize and filter files is a fantastic way to enhance your SharePoint file management and improve your productivity. 

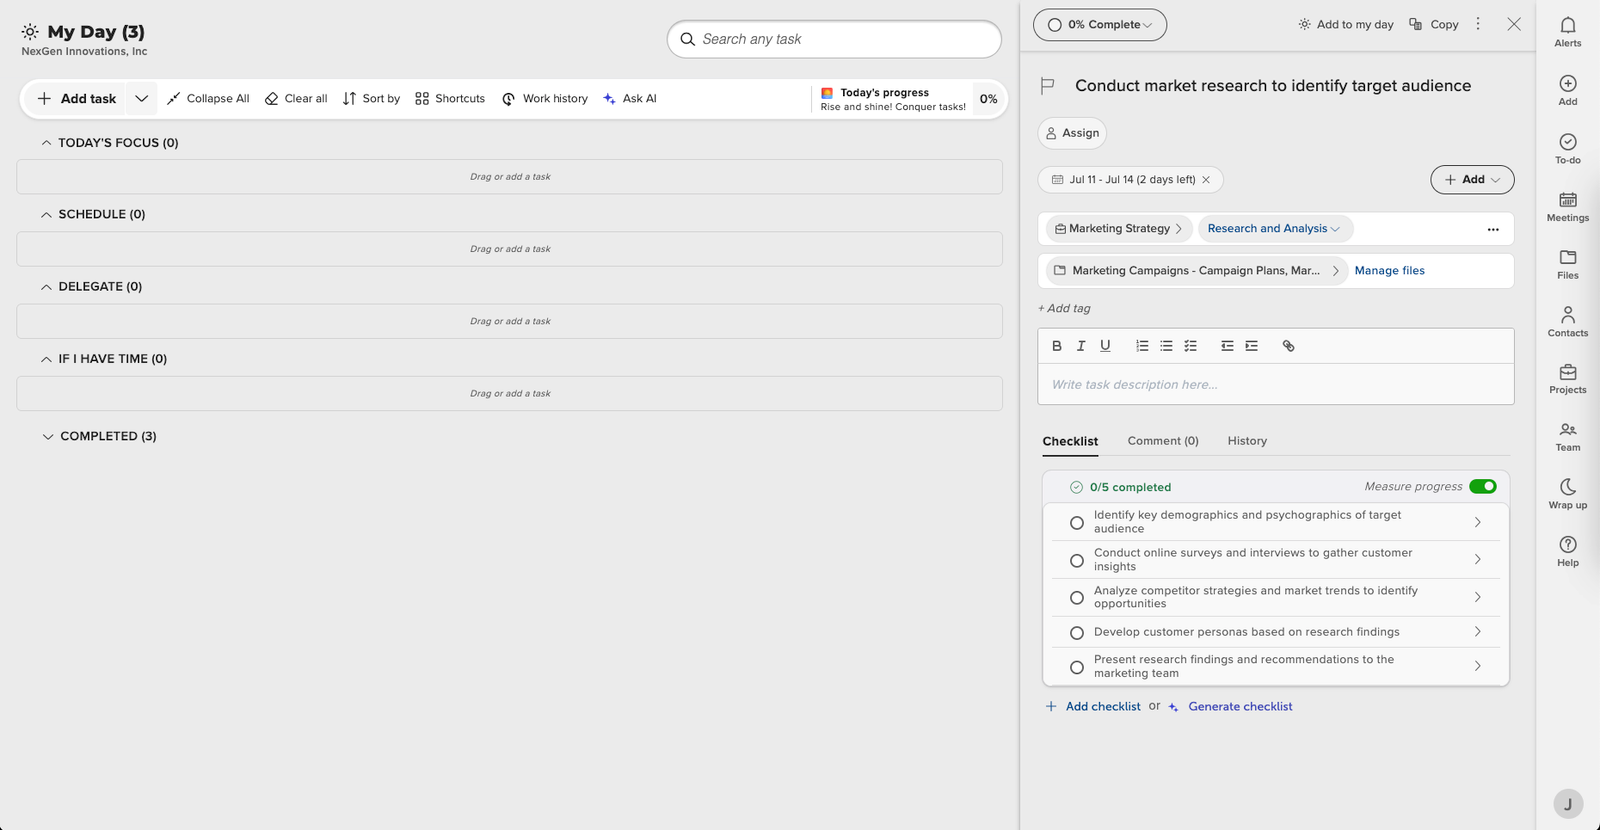
A SharePoint library with metadata columns and a filter menu

SharePoint file management

Tip 2: Create Custom Views in SharePoint File Management to Save and Display Settings

One of the most powerful features of SharePoint file management is the ability to create views. Views are different ways of displaying the files in a SharePoint library or list, such as by grouping, sorting, or filtering them. You can use views to organize and access your files more efficiently and conveniently, depending on your needs and preferences. 

For example, you can create a view that shows only the files that are modified by you, or a view that groups the files by their metadata categories, or a view that sorts the files by their creation date. You can also create views that show different columns or fields of information for each file, such as the file name, size, type, or status. 

To create and save a view in SharePoint, follow these steps: 

  1. Go to the SharePoint library or list where you want to create a view. 
  2. Click on the View options icon in the top right corner and select Create new view. 
  3. Choose the type of view you want to create, such as Standard View, Calendar View, or Gantt View. 
  4. Give your view a name and configure the settings and options for your view, such as the columns, filters, sorts, and groups. 
  5. Click on Save to create your view. 
  6. To switch between different views, click on the View options icon again and select the view you want to see. 
  7. To edit or delete a view, click on the View options icon, select Edit current view, and make the changes or click on Delete. 

Creating views can help you customize and save your file display settings in SharePoint, making your SharePoint file management easier and more effective. For more information and tips on creating views, check out this Microsoft support article. 

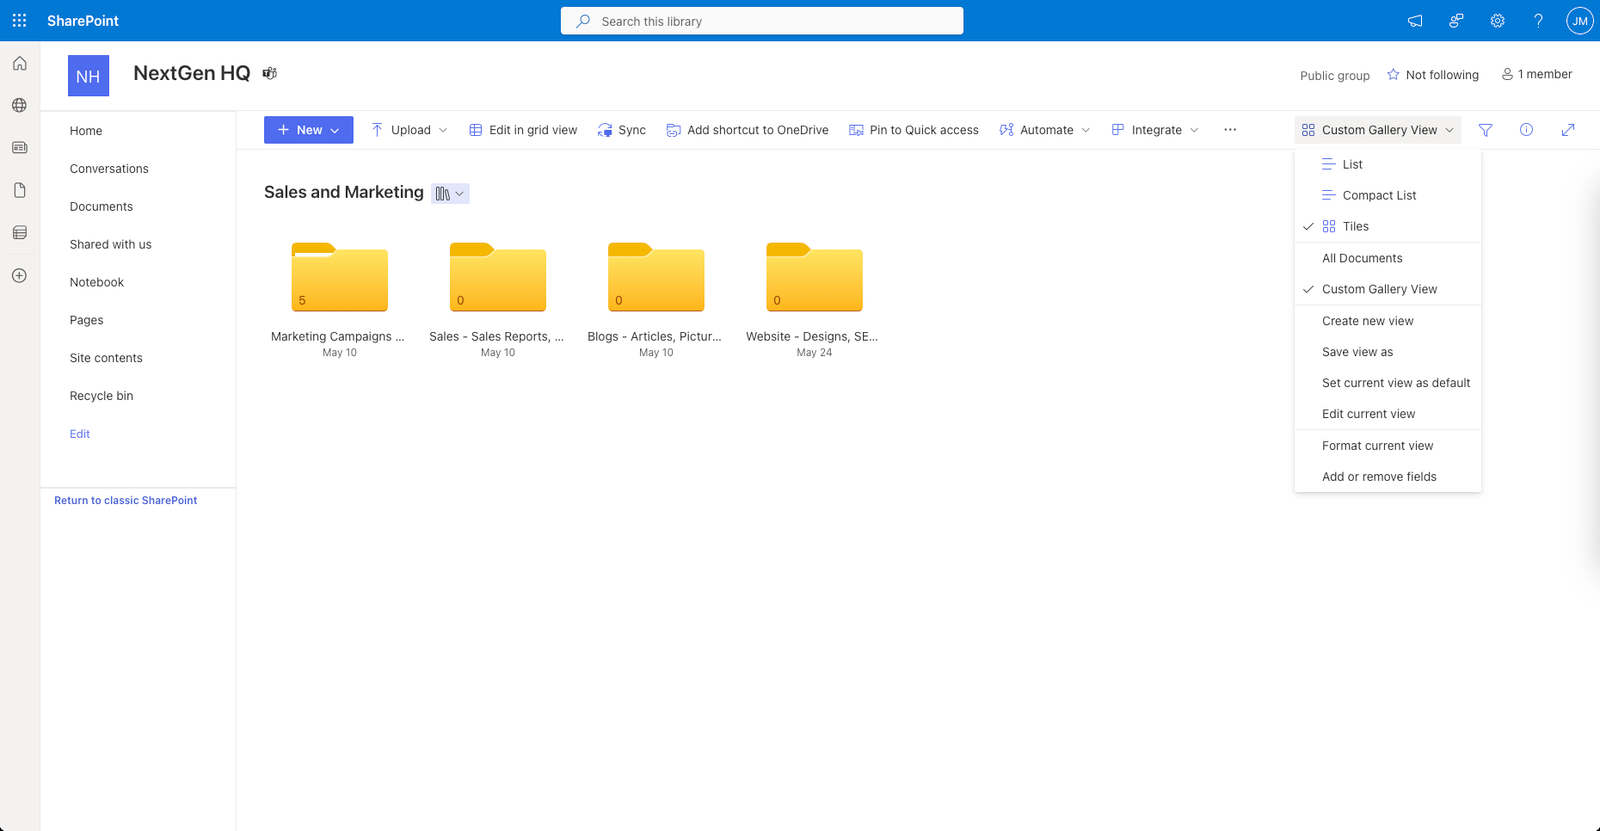
A SharePoint library with a custom view

SharePoint file management

Tip 3: Organize Files Hierarchically with Folders and Subfolders in SharePoint File Management

One way to organize your files in SharePoint libraries and lists is to use folders and subfolders to create a hierarchical structure. This can help you group your files by categories, topics, projects, or any other criteria that makes sense for your workflow. For example, you can create a folder for each department, and then create subfolders for each team or function within that department. 

However, using folders and subfolders also has some drawbacks. It can make SharePoint file management more complex and cumbersome, as you must navigate multiple levels to find the files you need. It can also create duplication and confusion, as the same file can be stored in different folders, or different files can have the same name in different folders. Moreover, using folders and subfolders can affect the performance and functionality of some SharePoint features, such as views, metadata, search, and workflows. 

Therefore, it is important to use folders and subfolders wisely and sparingly in SharePoint. Here are some best practices and guidelines to follow: 

  • Limit the number of levels of folders and subfolders. Ideally, you should not have more than two or three levels of folders and subfolders in your SharePoint library or list. This will make your file structure easier to navigate and maintain. 
  • Name your folders and subfolders consistently and clearly. Use descriptive and meaningful names that reflect the content and purpose of your folders and subfolders. Avoid using generic or ambiguous names, such as “Miscellaneous” or “New Folder”. 
  • Avoid duplication and redundancy. Do not store the same file in multiple folders, as this will waste space and create confusion. Instead, use shortcuts or links to refer to the same file from various locations. Also, do not create folders and subfolders that have the same or similar names, as this will make your file structure confusing and hard to distinguish. 

To create and manage folders and subfolders in SharePoint, follow these steps: 

  • Go to the SharePoint library or list where you want to create a folder or subfolder. 
  • Click on the New button in the menu bar and select Folder. Alternatively, you can click on the View options icon in the top right corner and select Show in grid view. Then, right-click on any cell and select New folder. 
  • Enter a name for your folder and click on Create. 
  • To create a subfolder, open the folder where you want to create a subfolder and repeat the steps above. 
  • To rename, move, delete, or share a folder or subfolder, right-click on the folder or subfolder and select the option you want. 

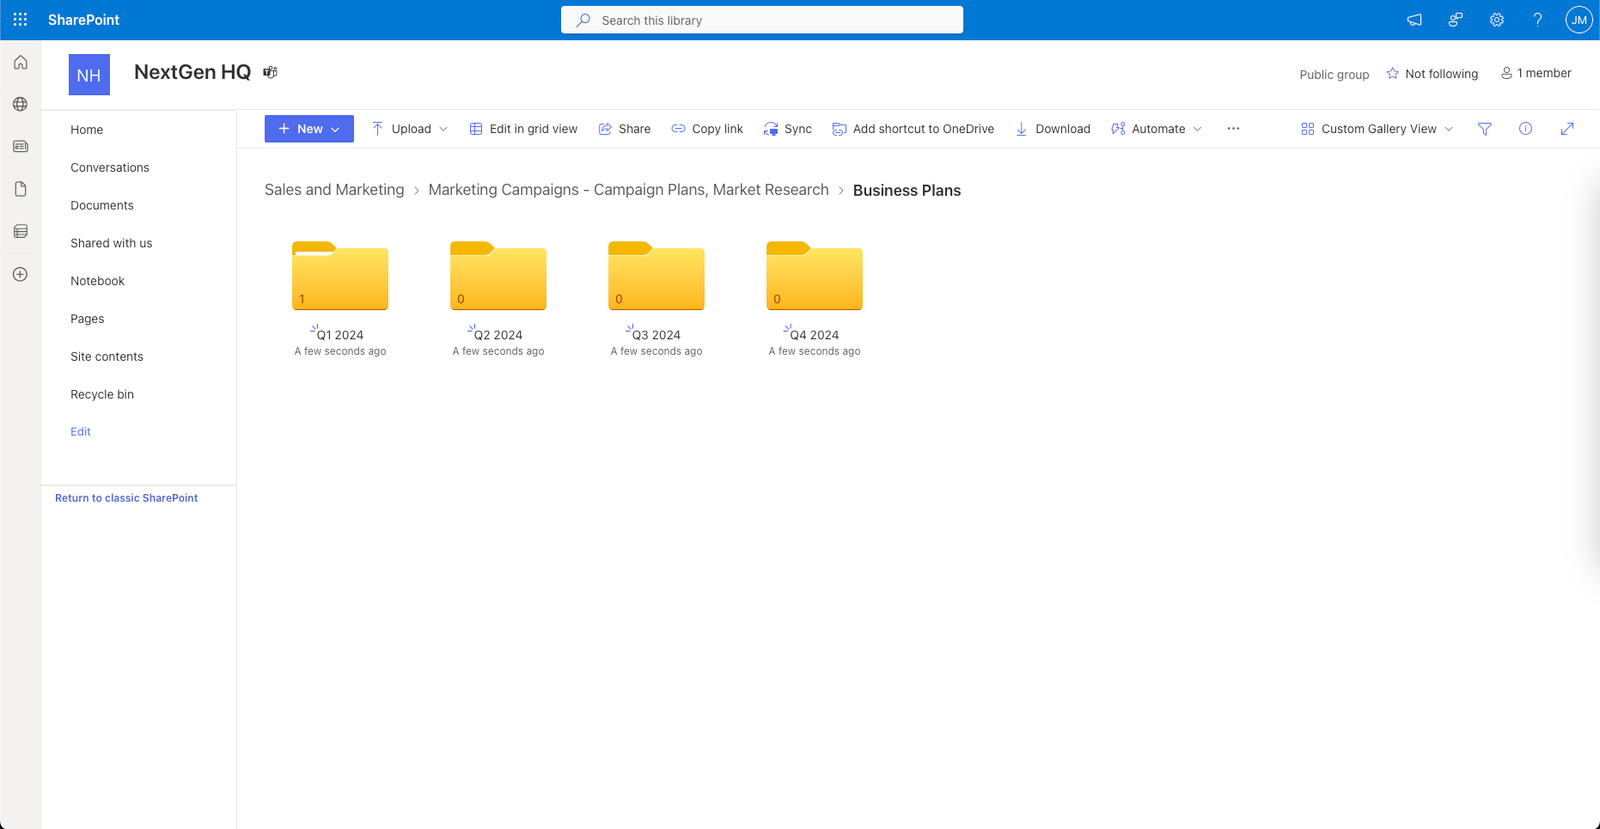
A SharePoint library with folders and subfolders

SharePoint file management

Using folders and subfolders can help you organize your files in SharePoint libraries and lists, but it can also create some challenges and limitations. Therefore, you should use them carefully and strategically, and follow the best practices and guidelines mentioned above. For more information and tips on using folders and subfolders in SharePoint, check out this Microsoft support article Should I create a list or some folders? 

Tip 4: Use co-authoring and version history to collaborate and track changes

One of the most powerful features of SharePoint file management is co-authoring, which allows multiple users to work on the same file at the same time, without creating copies or conflicts. Co-authoring enables real-time collaboration and communication, as you can see who is editing the file, where they are working, and what changes they are making. You can also chat with other users, leave comments, and suggest edits within the file. 

Another useful feature of SharePoint file management is version history, which records the history of changes made to a file, including who made them, when they were made, and what they were. Version history lets you compare different versions of a file, see what was added, deleted, or modified, and restore a previous version if needed. Version history helps you keep track of your work, avoid losing information, and resolve any issues or errors that may occur. 

To use co-authoring and version history effectively and smoothly in SharePoint, here are some tips and tricks: 

  • Communicate with other users. Before you start editing a file, check if anyone else is working on it, and let them know what you are planning to do. You can use the chat feature in the file or send an email or a message through Teams or other platforms. This way, you can avoid overlapping or conflicting edits, and coordinate your work better. 
  • Resolve conflicts. Sometimes, you may encounter a conflict when editing a file, such as when two users try to edit the same cell in an Excel spreadsheet, or when someone saves a different version of the file while you are working on it. When this happens, SharePoint will alert you and give you options to resolve the conflict, such as keeping your changes, discarding your changes, or opening a copy of the file. You can also contact the other user and discuss how to merge your changes. 
  • Restore previous versions. If you accidentally delete or overwrite something in a file, or if you want to revert to an earlier version of the file, you can use the version history feature to restore it. To do this, go to the file, click on the ellipsis (…) icon, and select Version history. You will see a list of versions, with the date, time, and author of each version. You can click on a version to view it, compare it with the current version, or restore it as the current version. 

To enable and use co-authoring and version history in SharePoint, follow these steps: 

  • Make sure the file is stored in a SharePoint library or OneDrive for Business folder, and that you and the other users have edit permissions for the file. 
  • Open the file in the browser or in the desktop app, depending on the file type and your preference. You can co-author Word, Excel, PowerPoint, and OneNote files in both the browser and the desktop app, but you can only co-author Visio files in the browser. 
  • Start editing the file as you normally would. You will see the names and cursors of other users who are editing the file, and the changes they are making. You can also chat with them, leave comments, and suggest edits within the file. 
  • Save the file when you are done. SharePoint will automatically save the file and create an updated version in the version history. You can view the version history by clicking on the ellipsis (…) icon and selecting Version history.

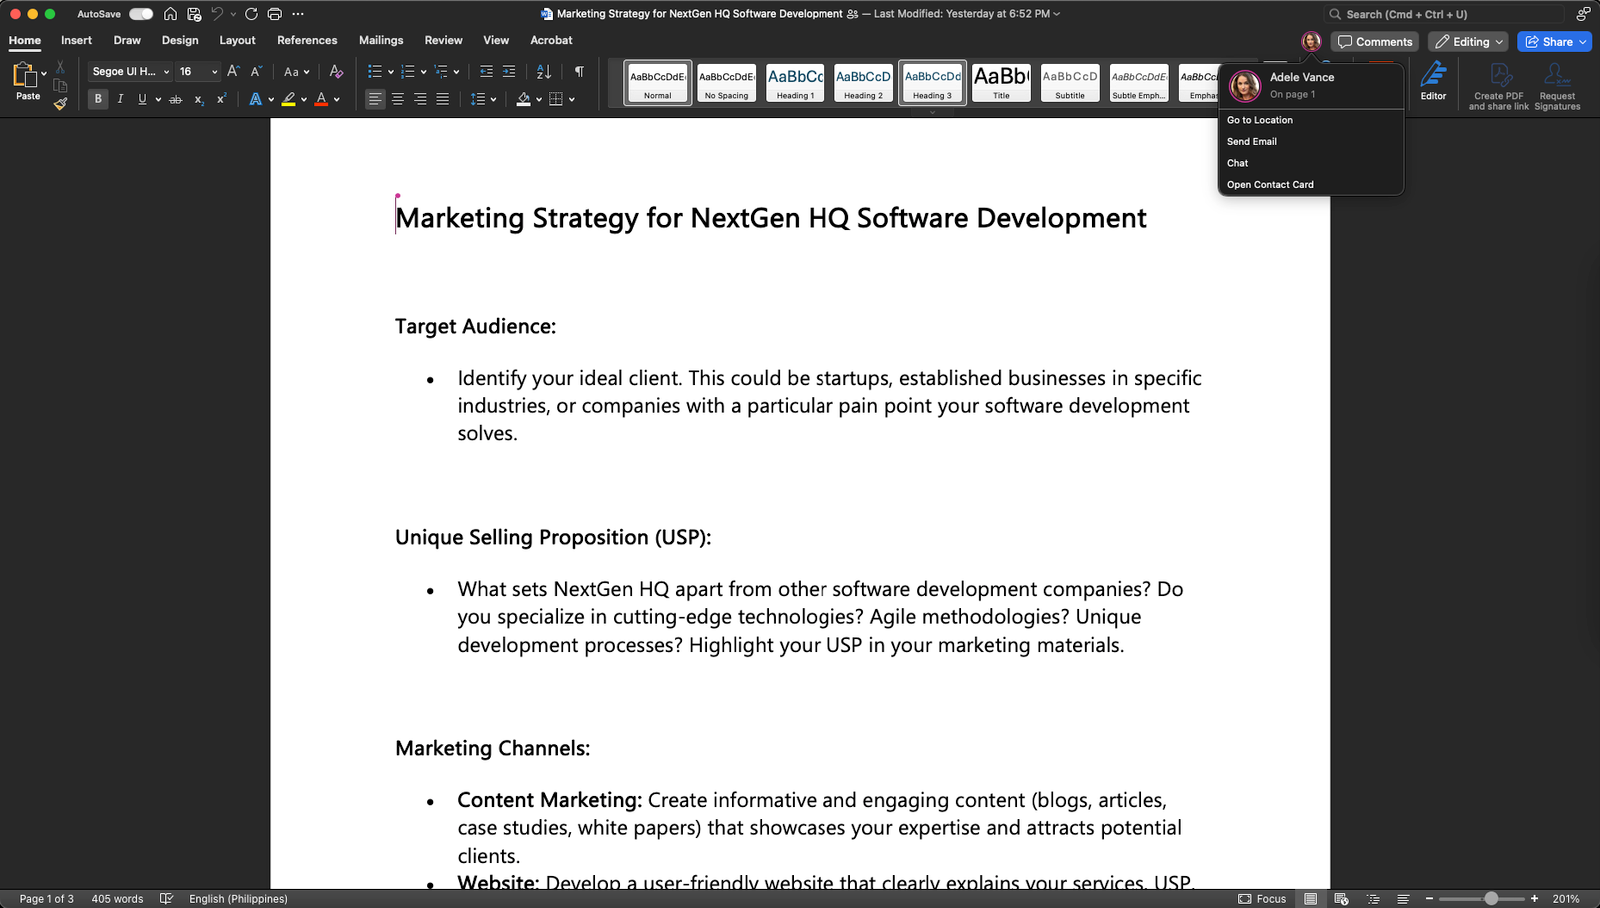
Co-authoring a Word document in SharePoint

SharePoint file management


Viewing the version history of a file in SharePoint

Tip 5: Use sharing and permissions to control file access and security

Another important aspect of SharePoint file management is sharing and permissions, which allow you to grant or restrict access to files and folders for different groups and individuals. Sharing and permissions can help you protect sensitive information, collaborate with specific people, and avoid unauthorized or accidental changes to your files. 

However, sharing and permissions can also be complex and confusing, especially when you have multiple levels of access and inheritance in your SharePoint site. To use sharing and permissions wisely and safely in SharePoint, here are some best practices and recommendations: 

  • Follow the principle of least privilege, which means giving users only the minimum level of access they need to perform their tasks. This can reduce the risk of data breaches, errors, and conflicts. For example, you can use the view-only or read-only permissions for users who only need to see the files, and the edit or contribute permissions for users who need to modify the files. You can also use the share or co-owner permissions for users who need to manage the files and folders. 
  • Avoid breaking inheritance, which means changing the permissions of a file or folder that is different from its parent folder. Breaking inheritance can create confusion and inconsistency in your SharePoint site and make it harder to manage and monitor the permissions. If you need to change the permissions of a file or folder, try to do it at the top level of the hierarchy, or create a separate library or site for it. 
  • Review access regularly, which means checking and updating the permissions of your files and folders periodically. This can help you ensure that the permissions are still relevant and appropriate, and that no one has access to files and folders they shouldn’t. You can use the access reports and audit logs in SharePoint to see who has access to what, and who has performed what actions on your files and folders. 

To share and manage permissions in SharePoint, follow these steps: 

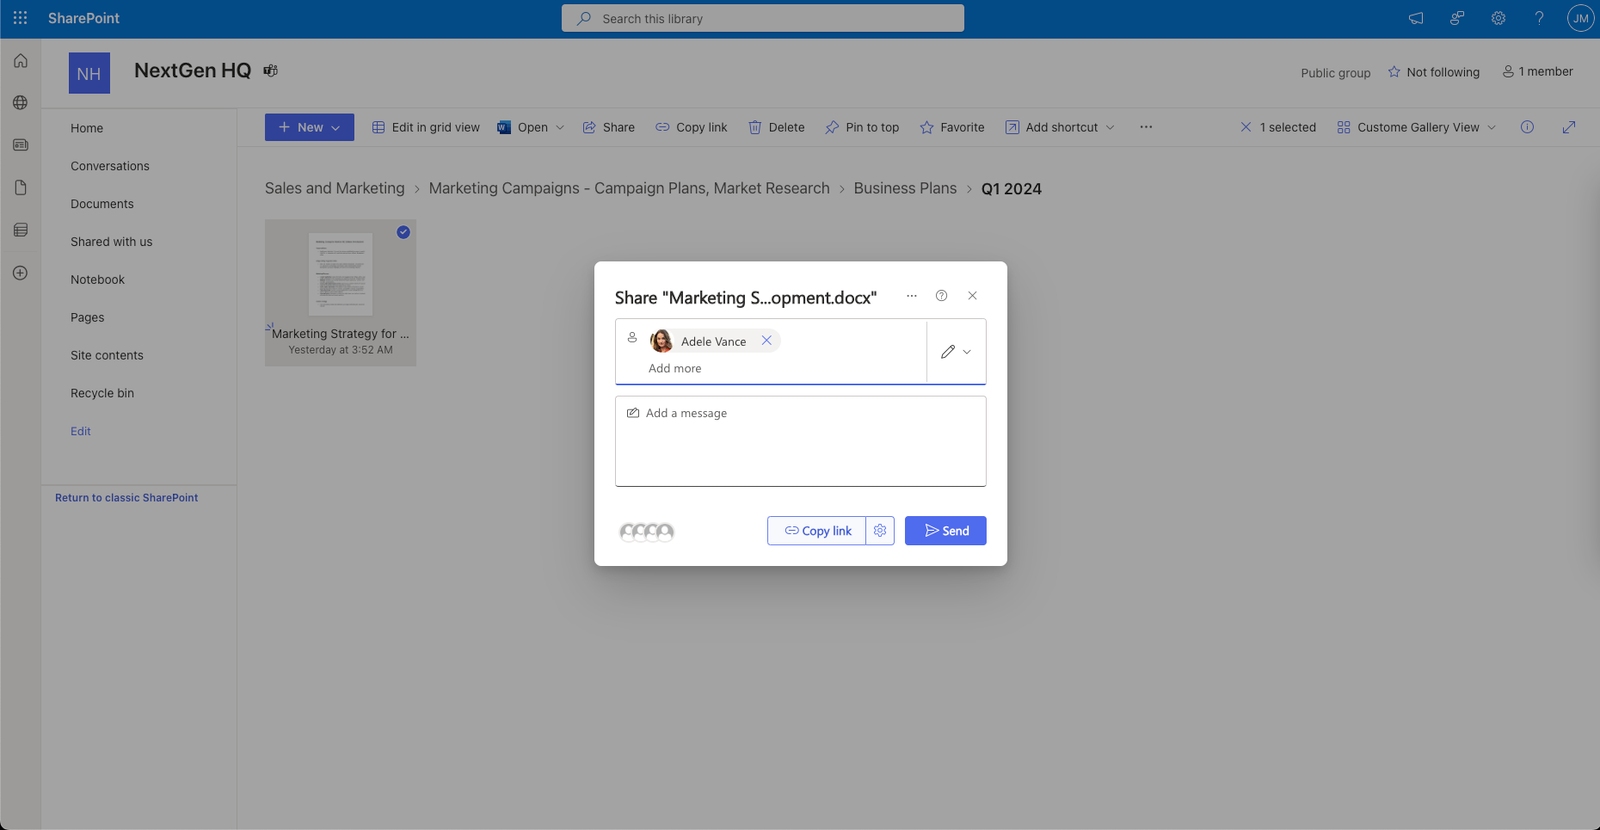
  1. Select the file or folder you want to share and click on the Share button. You can also right-click on the file or folder and select Share. 
  2. Enter the names or email addresses of the people you want to share with or select them from the suggestions. You can also click on the link settings icon to change the type of link you want to create, such as anyone, people in your organization, or specific people. 
  3. Choose the permission level you want to give them, such as view, edit, or co-owner. You can also add a message or expiration date to the link if you want. 
  4. Click on the Send button to share the link with the selected people. You can also copy the link and share it through other channels, such as email or chat. 
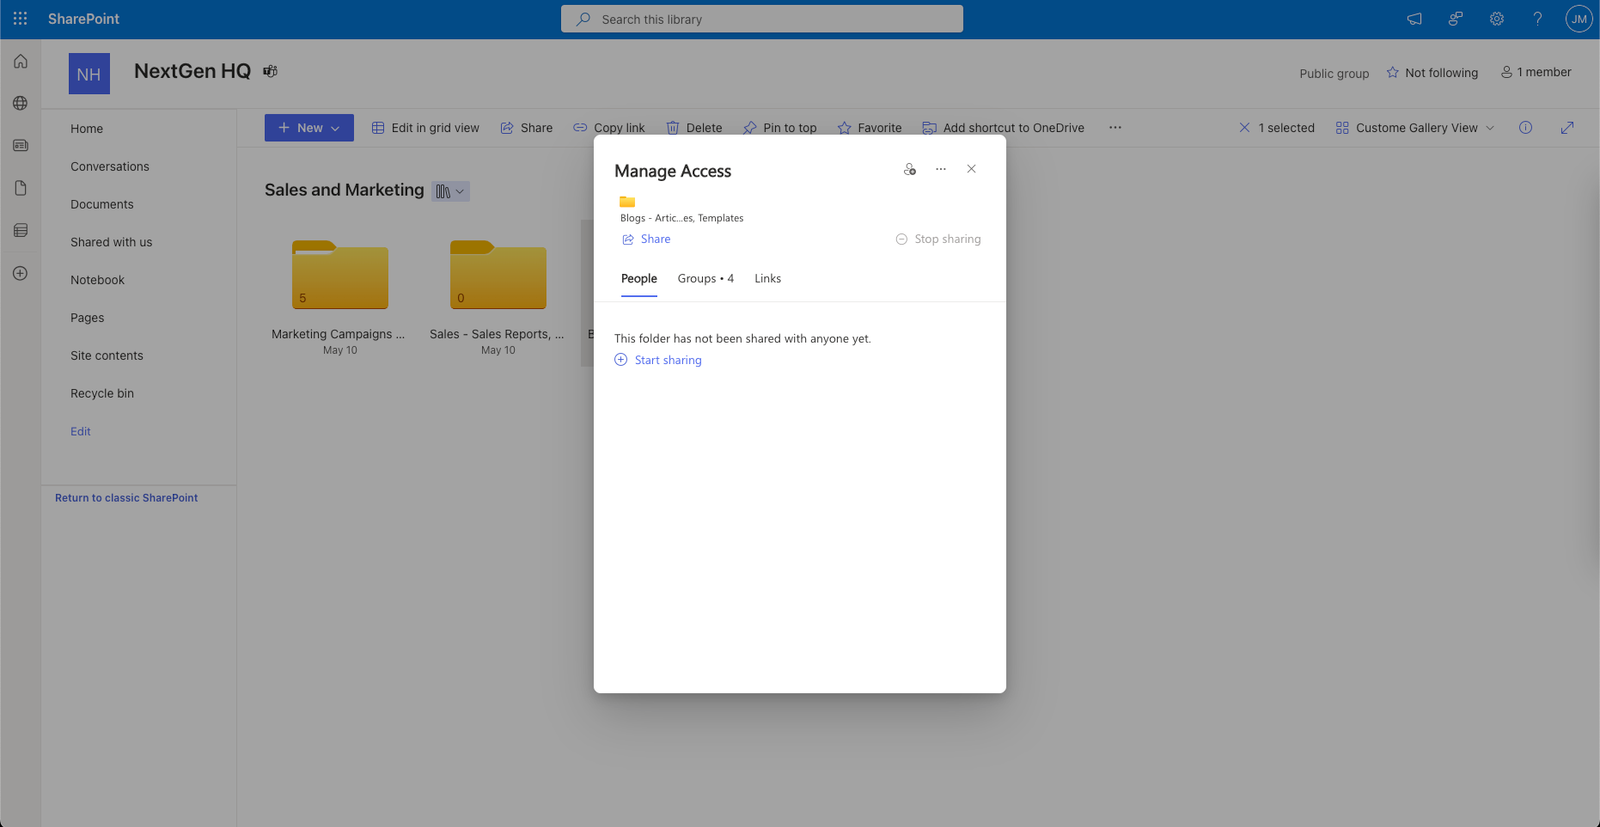
  5. To manage the permissions of the file or folder, click on the ellipsis (…) icon, and select Manage access. You can see who has access to the file or folder and change or remove their permissions. You can also stop sharing the file or folder or restore the default permissions. 

Sharing a file in SharePoint


Managing the permissions of a file in SharePoint

Conclusion

In this blog post, we have shared with you five tips to streamline your workflow and improve your productivity with SharePoint file management. These tips are: 

  1. Create and follow a file naming convention 
  2. Use metadata and views to organize and filter your files 
  3. Use co-authoring and version history to collaborate and track changes 
  4. Use sync and offline access to access your files anytime and anywhere 
  5. Use sharing and permissions to control file access and security 

By applying these tips, you can save time, reduce errors, and enhance collaboration with your team and stakeholders. You can also make the most of the powerful features and functionalities that SharePoint offers for file management. 

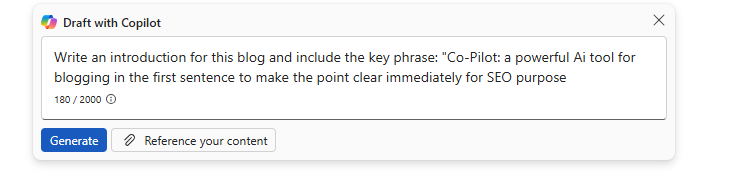
Learn how to manage projects better with AI (Artificial Intelligence)! 

Trovve helps you use AI technology for project management, giving you insights, tips, and guidance on how to improve efficiency, productivity, and collaboration. Our articles show professionals in different industries—like technology, professional services, and finance—how to use Trovve’s AI-enhanced features, Microsoft co-pilot and other AI tools for better project results. 

Click here to join our newsletter and start your 7-day free trial! 

FAQs

Here are some frequently asked questions and answers about SharePoint file management. 

Q: How can I find a file or folder in SharePoint? 

A: You can use the search box at the top of the page to enter keywords, file names, or metadata. You can also use filters and refiners to narrow down your search results. Alternatively, you can browse through the document library or site contents to locate the file or folder you need. 

Q: How can I restore a deleted or overwritten file or folder in SharePoint? 

A: You can use the recycle bin to restore items that have been deleted within the last 93 days (about 3 months). You can also use the version history to restore a previous version of a file that has been modified or overwritten. To access the recycle bin or the version history, click on the ellipsis (…) icon next to the file or folder, and select Restore from Recycle Bin or Version History. 

Q: How can I move or copy a file or folder in SharePoint? 

A: You can use the Move to or copy to commands to move or copy a file or folder to another location within the same site or across different sites. To use these commands, select the file or folder, and click on the Move to or copy to button on the command bar. You can also drag and drop the file or folder to the desired destination. 

Q: How can I check out or check in a file in SharePoint? 

A: You can use the check out and check in feature to prevent other users from editing a file while you are working on it. To check out a file, select the file, and click on the Check Out button on the command bar. To check in a file, select the file, and click on the Check In button on the command bar. You can also add comments or discard changes when you check in a file. 

Q: How can I share a file or folder with external users in SharePoint? 

A: You can share a file or folder with external users who have a Microsoft account or an email address. To share a file or folder, select the file or folder, and click on the Share button on the command bar. Enter the email addresses of the external users and choose the permission level you want to give them. You can also change the link settings or add a message if you want. Click on the Send button to share the file or folder with the external users. 
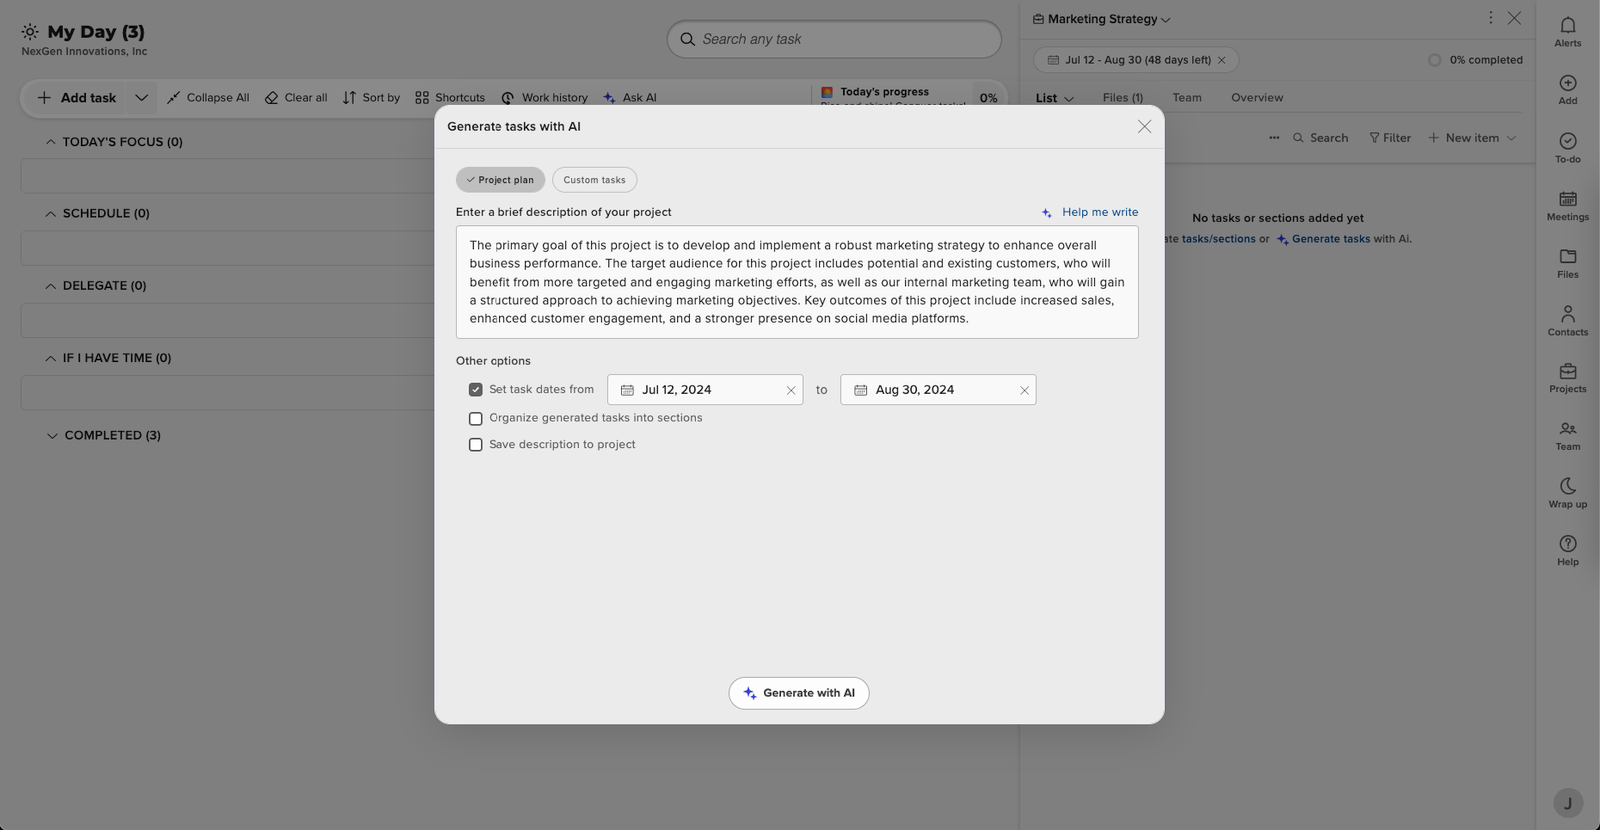
The Future of Risk Management: Predictive Analytics and AI in Project Planning

As the challenges of risk management become more complex, predictive analytics is becoming an essential tool for the discipline to adapt and evolve. In the current project environments, which are dynamic and changing, being able to anticipate potential problems and reduce risks proactively is vital. This is where combining predictive analytics and Artificial Intelligence (AI) makes a difference, as it significantly changes the way project planning is done. These technologies not only automate extensive data analysis but also improve the accuracy of risk evaluations. Therefore, predictive analytics and AI are transforming risk management by improving predictive abilities and decision-making processes, which help project managers deliver more successful and resilient projects. This change is not just a passing fad but a fundamental shift in how project risks are managed in the digital era. 

Leveraging Predictive Analytics in Risk Management for Effective Project Planning

Managing risks in project planning means identifying, assessing, and addressing risks that could negatively impact the project’s success. This process is essential for reducing uncertainties and ensuring project results meet the set goals. The key elements of good risk management are risk identification, risk evaluation, risk reduction strategies, and ongoing monitoring and evaluation.

In the past, risk management has depended on historical data and expert opinions to estimate and reduce risks. Managers would often use their knowledge and instincts to anticipate potential problems, using strategies such as contingency plans and risk registers to track and manage risks. This approach, while useful, often lacks the accuracy and scalability needed in more dynamic or complex project settings.

The problems and constraints of traditional risk management methods are becoming more obvious. These methods can be time-consuming, prone to human error, and often reactive rather than proactive. Moreover, they have difficulty dealing with the amount and complexity of data usually involved in large projects today. This is where predictive analytics in risk management can have a significant impact, offering more advanced tools and techniques to foresee and address potential risks more efficiently.

Understanding Predictive Analytics: A Key to Effective Risk Management

Predictive analytics is an advanced analytics branch that uses past data, statistical algorithms, and machine learning techniques to forecast future outcomes. The main idea is to find patterns in data and use them to estimate what might happen next, with a reasonable degree of confidence. In risk management, these forecasts help project managers foresee threats and opportunities, enabling them to make proactive choices and improve their strategies. 

In risk assessment, predictive analytics analyzes enormous amounts of data to identify risk factors that could affect project outcomes. It assesses the likelihood of different scenarios, helping teams get ready for the most probable risks. This approach enhances the precision of risk forecasts and provides valuable insights essential for the successful completion of projects. 

Several predictive analytics tools are important for project planning. Software like RiskyProject, Oracle Crystal Ball, and Palisade @RISK offer features that incorporate predictive modeling into the project planning phases. These tools evaluate risks from various perspectives and simulate the effect of different risk reduction strategies, thereby optimizing project results and resource allocation. 

How AI Improves Risk Management in Modern Projects

Artificial Intelligence (AI) has increased the potential of risk management by using advanced computational methods such as machine learning and deep learning. Machine learning enables computers to learn from and make decisions based on data without being explicitly programmed. Deep learning, a kind of machine learning, uses neural networks with many layers to examine various aspects of data at a complex level. These AI elements are essential in risk management for their capacity to handle massive amounts of data fast and with high accuracy. 

AI boosts predictive analytics in risk management by not only recognizing risks but also by learning from the results to improve future predictions. This ongoing learning process allows AI systems to get better over time, adjusting to new modes of risk as they arise. Furthermore, AI can automate the risk evaluation processes, saving time and resources needed for manual checks. It allows real-time risk tracking and instant reaction mechanisms, which are important in changing project settings. 

One significant instance where AI has effectively managed risks in large projects involves a major global bank using an AI system to spot and stop fraudulent transactions in real-time. Another example is the construction industry, where AI tools forecast safety incidents on work sites by analyzing data from sensors and project records. These systems estimate the probability of accidents before they happen, allowing project managers to take proactive steps to increase safety measures. By incorporating AI into their risk management models, these projects not only reduce potential risks more efficiently but also enhance overall productivity and safety. 

Combining Predictive Analytics and AI for Project Planning

Project planning can benefit from combining predictive analytics and AI, as this strategy uses both technologies to improve risk management. Predictive analytics provides the numerical basis by examining historical data and finding trends and patterns. AI enhances this by using machine learning algorithms to learn and adapt from new data, making the predictive models more precise over time. 

How to Combine Them Step-by-Step 

  1. Data Collection and Preparation: The first step is to collect all relevant project data, such as previous project results, resource consumption, timelines, and budget records. This data must be cleaned and organized to make sure it is ready for analysis. 
  2. Model Development: Using the prepared data, predictive models are created to estimate risks and outcomes. Machine learning algorithms are taught on this data to detect complex patterns and relationships that may not be noticeable to human analysts. 
  3. Simulation and Testing: After the models are created, they are tested through simulations to check their accuracy and dependability. Corrections and improvements are made based on the outcomes to increase prediction abilities. 
  4. Implementation and Monitoring: The validated models are then combined with the project planning systems. AI tools constantly track project progress and real-time data, providing updates and changes to risk evaluations as the project changes. 
  5. Feedback Loop: AI systems use the results and experiences from each project to learn and improve the models further, increasing the predictive capabilities for future projects. 

Advantages of Combining Them

Combining predictive analytics and AI for project planning offers several main advantages. Firstly, it improves the accuracy of risk predictions, allowing project managers to anticipate and prevent potential problems before they affect the project. This leads to better resource allocation, as predictive insights enable more informed decision-making about where and when resources are most required. Furthermore, this combination improves project outcomes by reducing delays and cost overrun, enhancing quality, and ensuring projects are completed on time and within budget. This advanced approach to risk management creates a more proactive and less reactive project management environment, establishing a new level of efficiency and effectiveness in project execution. 

Challenges and Considerations

The combination of AI and predictive analytics in risk management has many benefits, but also presents several challenges and ethical issues. Data privacy is a major concern, as risk management often deals with confidential information. It is vital to ensure that data used in predictive models is secure and complies with regulations like GDPR. 

Another important aspect is the reliability of predictions. Predictive analytics in risk management depends on the data quality and the suitability of the models used. Faulty or biased data can lead to incorrect predictions, resulting in bad decision-making. Furthermore, relying too much on automated systems might create overconfidence, making projects prone to unanticipated risks that the AI did not foresee. 

These challenges require significant investment in technology and expertise. The expense of setting up advanced AI systems can be daunting, especially for smaller organizations. Moreover, these systems are complicated and need specialized knowledge to manage efficiently. It is crucial to ensure that staff are well trained to use these tools and understand their outputs. 

How AI and Predictive Analytics Will Change Risk Management

AI and predictive analytics are getting better at risk management, making more accurate and detailed assessments and detecting problems early. Real-time data analytics will make risk management systems more agile and adaptable to changing situations. 

Modern technologies like quantum computing and blockchain could also improve predictive analytics in risk management. Quantum computing could process data much faster and handle more complexity, allowing for quick risk analysis on huge datasets. Blockchain could provide a safe and straightforward way to track transactions and data, lowering fraud and increasing data quality. 

Businesses should get ready for these changes by having a strong technological base and a culture of constant learning and change. They should train their employees in innovative technologies and be flexible in how they manage projects. As these technologies change what can be done, being aware and nimble will help businesses use AI and predictive analytics for risk management well.

Conclusion

In this discussion, we’ve seen how AI and predictive analytics are transforming risk management in project planning. These technologies improve the precision of risk evaluations, allow for real-time tracking, and support proactive management approaches. Adopting these innovations not only improves project results but also equips businesses for future threats and opportunities. As we progress, the strategic use of AI and predictive analytics will be vital for maintaining competitiveness and managing risks successfully. Companies are advised to regard these tools as indispensable parts of their risk management frameworks to handle the complexities of modern projects more effectively. 

Learn how to manage projects better with AI! 

Trovve helps you use AI technology for project management, giving you insights, tips, and guidance on how to improve efficiency, productivity, and collaboration. Our articles show professionals in different industries—like technology, professional services, and finance—how to use Trovve’s AI-enhanced features, Microsoft co-pilot and other AI tools for better project results. 

Click here to join our newsletter and start your 7-day free trial! 

FAQs

1. What are predictive analytics?

Predictive analytics is the process of using past data, mathematical models, and machine learning methods to forecast future results based on data trends.

2. How do AI and predictive analytics enhance risk management in projects?

AI and predictive analytics enhance risk management by offering more precise risk evaluations, streamlining risk identification, and facilitating risk tracking in real time, which assists in making wise choices and preemptive risk reduction.

3. How can AI and predictive analytics help small businesses with risk management?

AI and predictive analytics can provide great benefits for small businesses, especially as more accessible solutions emerge. These technologies can help small firms be more competitive by improving decision-making and risk handling.

4. What are some typical tools used for predictive analytics in project planning?

Some examples of tools are RiskyProject, Oracle Crystal Ball, and Palisade @RISK. These tools assist in predicting risks and examining the possible effects of various risk reduction methods.

5. What are the difficulties of using AI and predictive analytics for risk management?

Difficulties include protecting data privacy, handling the complexity of execution, controlling the cost of cutting-edge technologies, and the necessity for ongoing staff training to manage new systems efficiently.

6. How can companies get ready to incorporate AI and predictive analytics into their project planning?

Companies can get ready by getting the right technology infrastructure, educating employees, embracing a culture of innovation, and keeping up with technological progress in risk management.

7. How can emerging technologies such as quantum computing and blockchain improve predictive analytics and AI?

Quantum computing can boost data processing power, making risk analysis quicker and more precise, while blockchain can provide better security and accountability for handling risk-related data.

8. Do we still need human oversight when we have advanced AI and predictive analytics?

Yes, we do. AI and predictive analytics are useful tools that can help us understand data and streamline many tasks, but human expertise is vital for making sense of data accurately and making complex decisions that technology might miss.


Streamlining Operations: AI-Powered Resource Allocation for Project Success

Resource allocation in project management is a key factor for successful project completion, but it is also one of the hardest aspects to get right. Conventional methods often rely on manual planning and changes, which can cause problems such as over- or underuse of resources. These problems affect budgets and deadlines and the overall quality and delivery of projects. 

Artificial Intelligence (AI) is a game-changing tool that is changing how organizations manage projects. AI technologies offer advanced solutions to improve operations, making resource allocation more flexible and adaptive to the changing project requirements. By using AI in the process, companies can automate complicated decision-making, forecast future resource demands with more precision, and balance the workloads more efficiently. 

This blog post examines how AI-enabled resource allocation is creating new benchmarks for project success, giving a better understanding of its workings, advantages, and potential to transform traditional project management practices. 

Understanding Resource Allocation in Project Management

Resource allocation in project management is the process of distributing available resources in a way that optimizes their use while considering the different limitations of a project, such as time, budget, and human resources. This strategic allocation is crucial for ensuring that projects are finished on time, within budget, and to the desired quality standards. 

However, resource allocation is not without difficulties. Common problems include overallocation, where resources are assigned too many tasks, resulting in exhaustion and lower productivity. However, underutilization happens when resources are not fully used, leading to lost opportunity and higher project costs. These allocation errors can affect project schedules and costs, significantly impacting project results. 

The consequences of ineffective resource allocation can be severe. Projects may face setbacks as teams try to adjust workloads, or they might exceed budget when more resources are hastily brought in to meet deadlines. Moreover, the quality of work can decline if resources are not perfectly suited to tasks, endangering the overall success of the project. Solving these challenges is vital for sustaining the health and viability of project management endeavors. 

The Rise of AI in Operational Management

Artificial Intelligence (AI) has brought about a major shift in how businesses manage complex processes and decisions. AI started to process data and automate tasks in the second half of the 20th century, but it has become more advanced and now plays a vital role in strategic decision-making and operational effectiveness. 

Project management is one of the areas where AI has changed many aspects, changing traditional methods of planning, monitoring, and reporting. For planning, AI algorithms can estimate project schedules, evaluate risk factors, and propose optimal ways to allocate resources. Monitoring projects has also improved with AI, which can now measure progress in real time and change parameters immediately to fit project objectives. Reporting, too, has benefited from AI’s ability to produce comprehensive analytics and practical suggestions, helping managers make smart decisions fast. 

Specific AI technologies have helped fine-tune resource allocation in project management. Machine learning models, for example, examine past data and current project performance to predict future resource requirements with high precision. Predictive analytics takes it a step further by detecting potential problems and advising proactive changes to resource distribution. These AI tools ensure that resources are used effectively and flexibly, reducing waste, and increasing efficiency in project settings. This technological skill not only simplifies operations but also greatly increases the chances of project success. 

Optimizing Resource Allocation in Project Management: The Role of AI

AI enhances resource distribution in project management, making sure the right resources are available when needed. Using advanced AI techniques, companies can improve their resource allocation processes, leading to better project results. 

Forecasting Resource Needs with Predictive Analytics: Predictive analytics uses past data to forecast future resource needs. By finding patterns from previous projects, AI can estimate what kinds of resources are needed at each stage of a project, helping managers plan better. This helps avoid resource problems and ensure smooth project flow. 

Matching Resources with Project Requirements with Machine Learning Models: Machine learning algorithms match project tasks with the best resources. These models look at several factors, such as resource skills, availability, and performance, to automatically assign resources in a way that improves productivity and reduces downtime. This matching process improves efficiency and quality, as resources are well suited to their tasks. 

Making Real-Time Adjustments and Automated Decisions: AI systems can adjust resource allocation in real time as project conditions change. If a project is faster or slower than expected, AI can redistribute resources right away, without human help. This flexibility is important for dealing with unexpected changes and keeping project momentum. 

Examples of Successful AI Use in Resource Allocation

  1. Tech Industry: A software company used AI to allocate coders and developers across projects. The AI system tracked project progress and developer performance to optimize assignments, resulting in 30% faster project delivery. 
  2. Construction Sector: A construction firm used AI to manage the allocation of machinery and labor across sites. The AI system calculated the best deployment of resources based on project deadlines and resource availability, reducing idle times and cost overruns. 

These examples show how AI improves the way resources are allocated in project management and helps increase operational efficiency and performance. With AI, organizations can better manage complex project requirements, leading to more reliable and successful project results. 

Streamlining Project Success: AI’s Impact on Resource Allocation in Project Management

AI-enabled resource management significantly improves the way resources are assigned to projects, bringing many benefits that improve operations and project health. 

Higher Efficiency and Lower Waste: AI-based systems allocate resources optimally, ensuring that every resource is used well, reducing idle time, and avoiding duplication. This higher efficiency not only makes project execution faster but also lowers waste, whether it’s time, materials, or labor. For example, AI can plan machinery and human resources in a way that minimizes overlap, thus increasing use and saving costs of under-used assets. 

Better Ability to Deliver Projects on Time and Within Budget: One of the key benefits of AI in resource management is its ability to improve project delivery within the given deadlines and budgets. By using predictive analytics, AI can anticipate potential problems and recommend resource adjustments to address these issues. This proactive approach enables project managers to stick more closely to budget and time limits, reducing the chance of expensive overruns. 

Better Workload Balance and Team Satisfaction: AI algorithms can smartly assign tasks among team members based on their abilities, experience, and current workload. This balance avoids employee exhaustion and underuse, resulting in higher job satisfaction and better team spirit. A well-balanced team is more efficient and can keep up a higher quality of work, which is vital for project success. 

Scalability and Adaptability to Different Project Sizes and Complexities: AI systems are inherently scalable, making them suitable for projects of varied sizes and complexities. Whether it’s a small internal project or a large-scale operational project, AI can adjust its resource allocation strategies accordingly. Moreover, AI’s adaptability allows it to respond to the project’s changing requirements, providing tailored solutions whether the project is growing or facing unforeseen difficulties. 

 Potential Challenges and Considerations

AI-powered resource allocation can offer many benefits, but it also comes with some challenges and considerations that need to be addressed to fully utilize its potential in project management. 

Dealing with the Learning Curve of New AI Tools: Introducing AI systems means a significant learning curve for project teams. Employees need to be trained on how to use the new systems efficiently and how AI decisions are made. This training can take time and needs ongoing support to make sure all team members are skilled and confident with the technology. 

Integration Challenges with Existing Project Management Systems: AI tools need to integrate smoothly with existing project management software and systems. However, compatibility issues can occur, causing interruptions in workflow and delays in project deadlines. It is crucial to ensure that AI solutions can work well within the established infrastructure, but this can be technically difficult. 

Ethical Issues and Bias in AI Decision-Making: AI systems depend on data to make decisions, which can unintentionally reflect existing biases in that data. This can lead to unfair resource allocation, affecting project quality and team spirit. Addressing these biases and ensuring ethical AI practices is essential to maintain trust and fairness. 

Cost of Implementation and ROI Issues: The initial cost of implementing AI can be high, and organizations must evaluate the return on investment. While AI can lower costs over time through improved productivity and reduced waste, the upfront investment can be a hindrance, especially for smaller organizations. Careful planning and analysis are needed to ensure that the benefits of AI outweigh the costs. 

It is important to navigate these challenges for organizations looking to use AI in resource allocation to improve project management outcomes effectively. 

Future Trends in AI and Project Management

AI is constantly developing, and its influence on how resources are distributed in project management is bound to increase, introducing innovative technologies and methods that could further transform how projects are managed. 

Emerging AI Technologies: Looking forward, improvements in neural networks and deep learning are set to boost AI’s predictive abilities, making resource estimation even more precise and adaptable. Moreover, the combination of AI with Internet of Things (IoT) devices in project locations could enable real-time resource monitoring and allocation, significantly increasing productivity and agility to project demands. 

Predictions on AI’s Impact in the Next Decade: In the next ten years, AI is likely to become more independent in its decision-making processes, reducing the need for human input and allowing project managers to concentrate on strategic decisions and leadership. This change will not only accelerate project phases but also enhance the accuracy with which resources are distributed, minimizing excess, and maximizing output. 

The Role of Ongoing Training and Development: To keep up with fast AI developments, ongoing training and development will be vital for project management professionals. As AI tools become more advanced, maintaining a workforce that is well-informed about the latest AI technologies and methods will be crucial. This continuous learning will ensure that teams can use AI to their full potential, improving project results and a competitive edge. 

Conclusion

AI has improved resource allocation in project management, making it more efficient, timely, and balanced. AI tools can plan resources better and make real-time changes, which are key for project success. AI technologies will keep improving project management practices. Organizations should use these AI-powered tools, not only to improve project results but also to keep up with the fast-changing technology. The future of project management is to use these innovations, and always adapt and learn to use AI fully.

Learn how to manage projects better with AI! 

Trovve helps you use AI technology for project management, giving you insights, tips, and guidance on how to improve efficiency, productivity, and collaboration. Our articles show professionals in different industries—like technology, professional services, and finance—how to use Trovve’s AI-enhanced features, Microsoft co-pilot and other AI tools for better project results. 

Click here to join our newsletter and start your 7-day free trial! 

FAQs

  1. How does AI-powered resource allocation work? AI-powered resource allocation uses artificial intelligence tools, like machine learning and predictive analytics, to improve how resources are allocated in project management. It automates activities such as estimating resource demands, assigning resources to project needs, and changing resource deployment in real time. 
  2. How does AI benefit project management? AI improves project management by boosting productivity, minimizing waste, and assigning resources appropriately based on project requirements. AI tools assist in forecasting resource demands, distributing workloads, and adapting in real-time, which helps in achieving project goals and keeping within budget. 
  3. What are the difficulties of using AI in project management? Difficulties include the need to master new AI technologies, compatibility issues with current project management systems, dealing with innate biases in AI choices, and the initial expenses of implementation. These difficulties must be overcome to use AI efficiently in project management. 
  4. How can AI help project management for small organizations? AI can help small organizations with their project management. Even if the initial cost is high, better results and lower expenses eventually can make it worth it. Smaller projects can also use AI tools that are customized for their budget and requirements. 
  5. How will AI for project management change in the future? Future changes may involve more refined AI models that can run whole projects by themselves, better connection with IoT devices for instant resource monitoring, and improved machine learning algorithms for more precise forecast analytics. AI will keep evolving project management, making it more productive and successful.